Top Posts
Best Day trips from Sendai
The Sendai Travel Guide: Real Japan
A Self-Guided Art Walk in Kigali: Exploring Kacyiru’s Art Centres
Windhoek Travel Guide: Is Namibia’s Capital Worth Visiting?
Kibiji Cycling Route Rentals: A Day Trip from Okayama
Okayama Travel Guide: A Practical Base for Kurashiki and the Kibi Plain
Is Tottori Worth Visiting on a Japan Trip?
North Sumatra Itinerary: Bukit Lawang, Berastagi & Lake Toba
Lake Toba & Samosir Island: Is It Worth Visiting?
Mount Sibayak Sunrise Hike: Our Experience in Berastagi, Sumatra
LBSB World
  • Home
  • Destinations
    • Africa
      • Namibia
      • Rwanda
    • Asia
      • China
      • Indonesia
      • Japan
    • Europe
      • Albania
      • Bosnia-Herzegovina
      • Croatia
      • Montenegro
      • Netherlands
      • North Macedonia
      • Serbia
    • North America
      • Dominican Republic
  • Travel itineraries
  • Plan your trip
  • About Us
    • About Sam & Livia
    • The Story Behind Our Full-Time Travel Life
    • abearcalledpaddington
Tag:

Guide

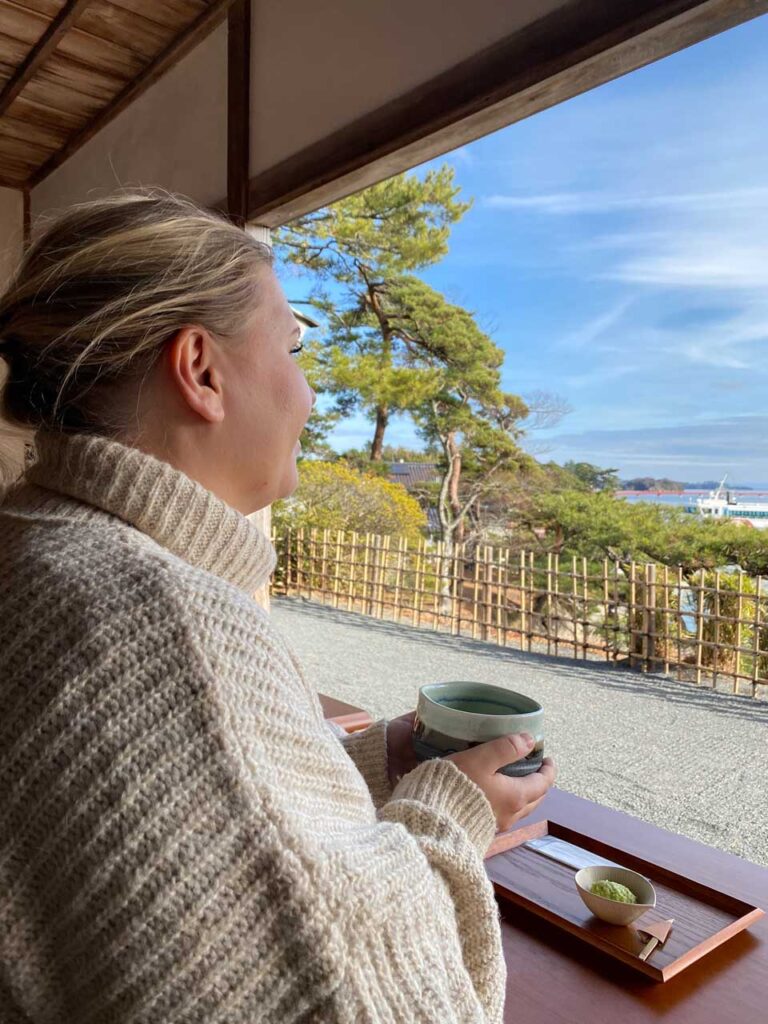
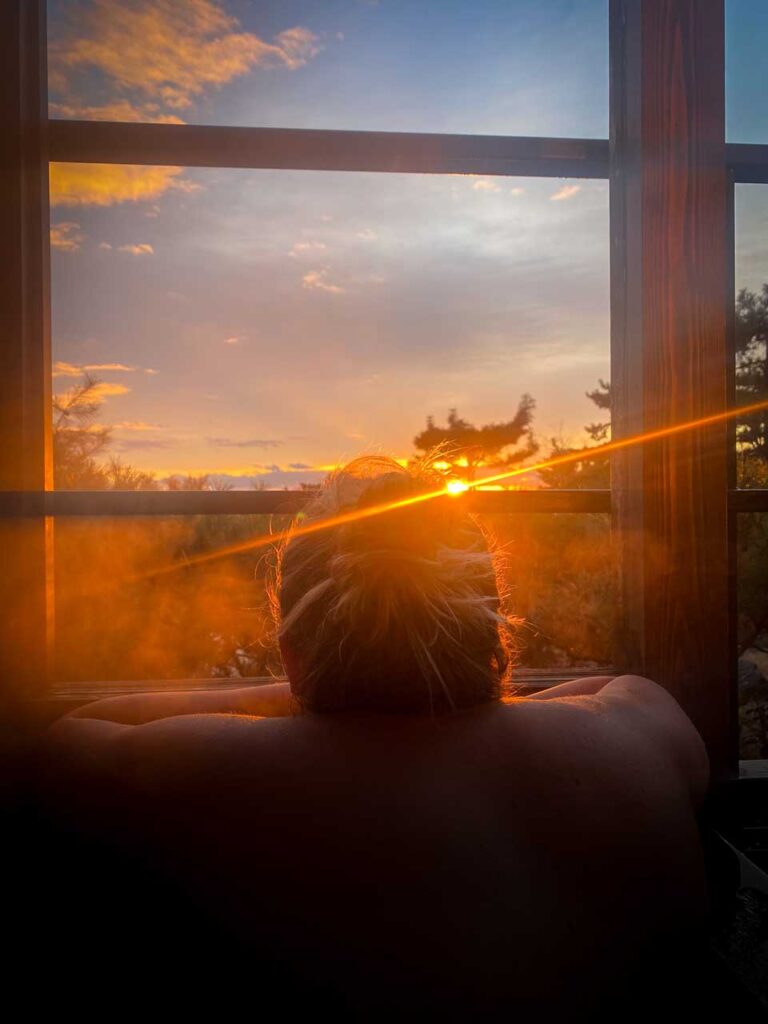
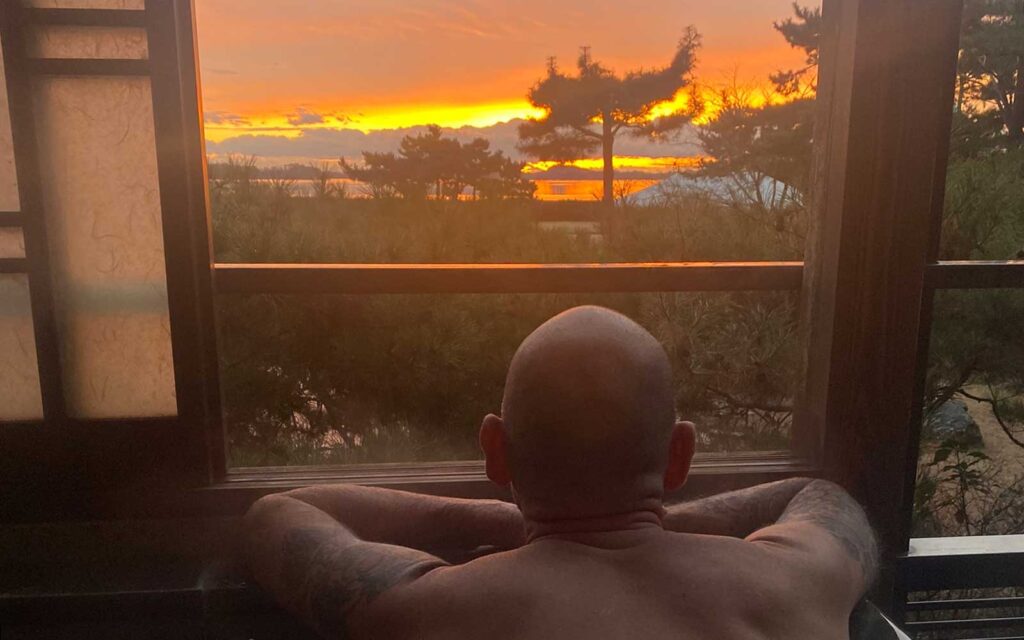
Sam relaxing at Matsushima Ichinobo
Japan

Best Day trips from Sendai

by Sam September 7, 2026
written by Sam

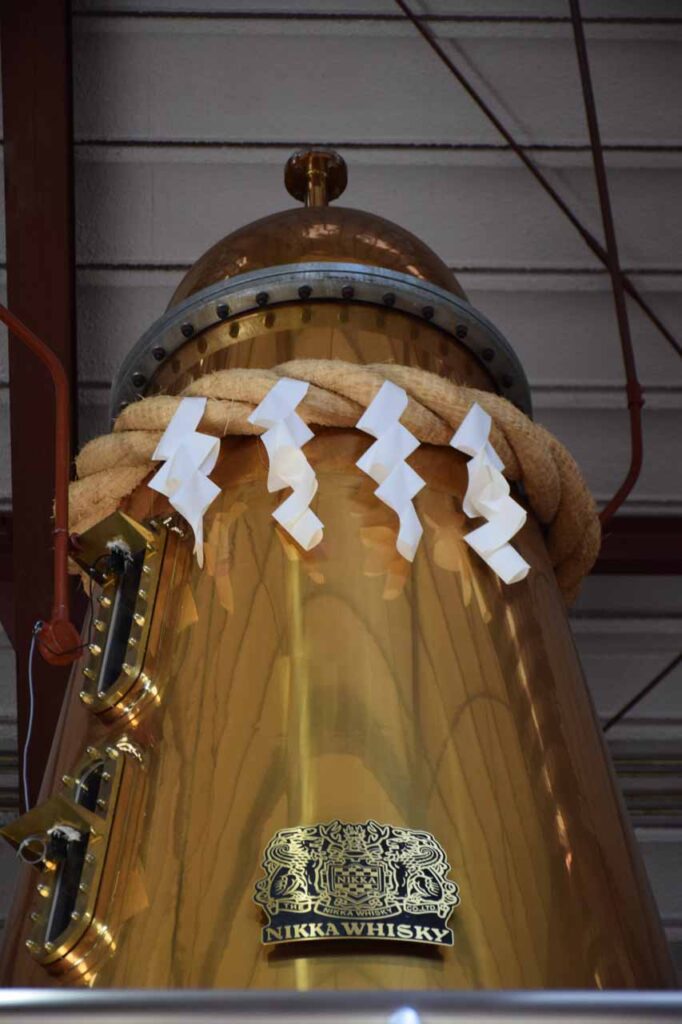
Sendai is a brilliant base for day trips, especially if you want to see more of Tohoku without changing hotels every night. From the city, you can easily reach Matsushima for coastal views and island boat trips, Nikka Whisky Miyagikyo Distillery for a slower mountain-side whisky stop, and Yamadera for one of the most atmospheric temple climbs in northern Japan.

If you haven’t read our Sendai travel guide, now’s a good chance!

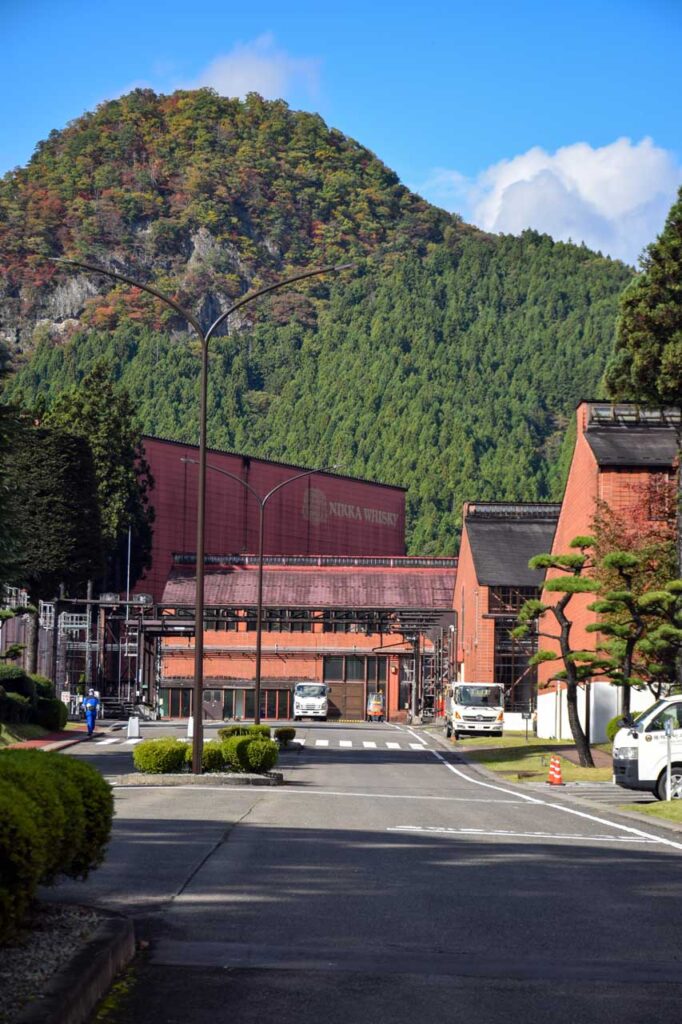
Exclusive Nikka Whisky
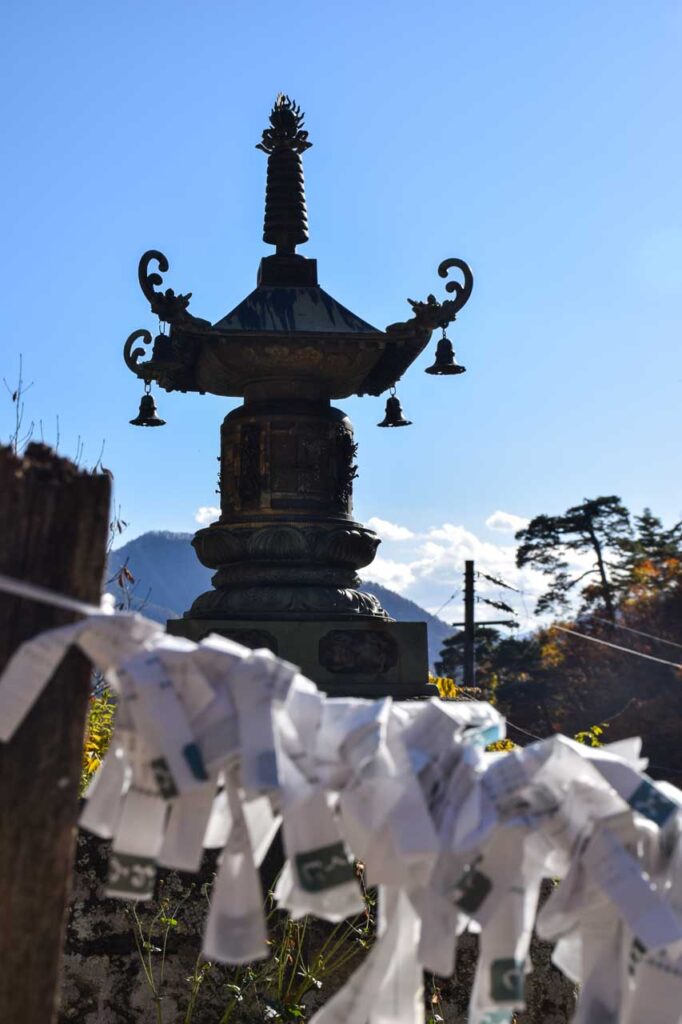
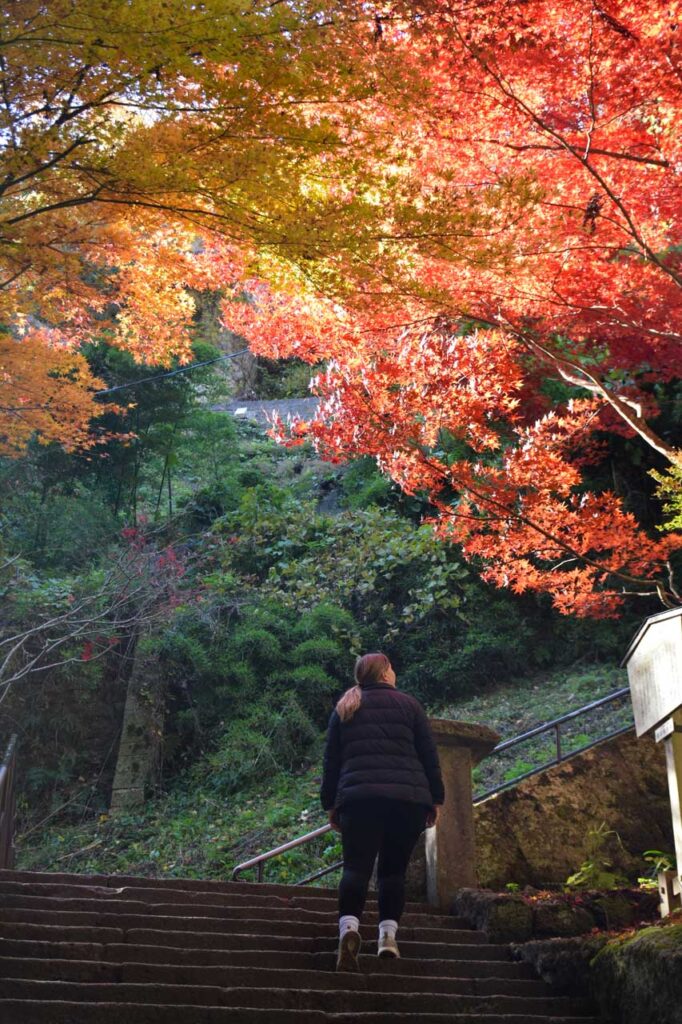
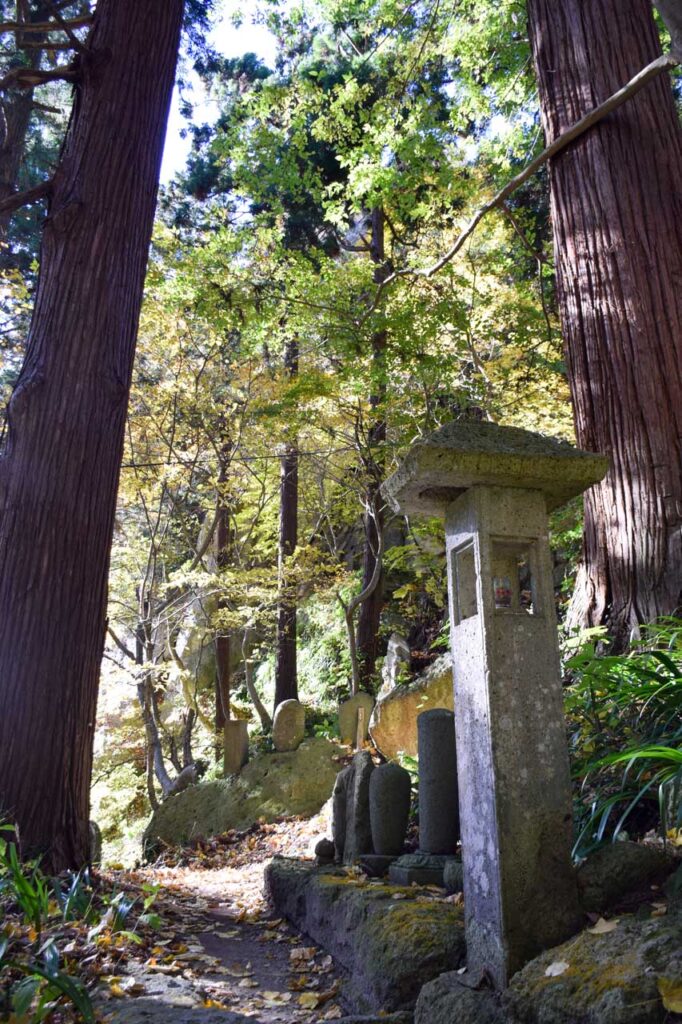
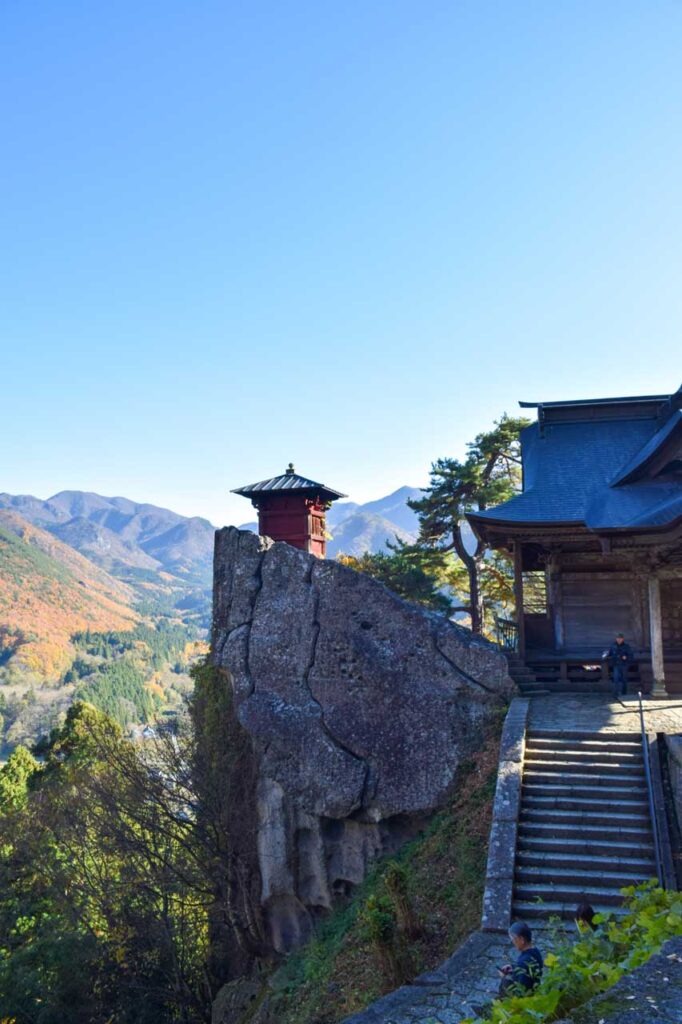
Risshaku-ji Temple, Yamadera
Sakumani Onsen
Sakumani Onsen

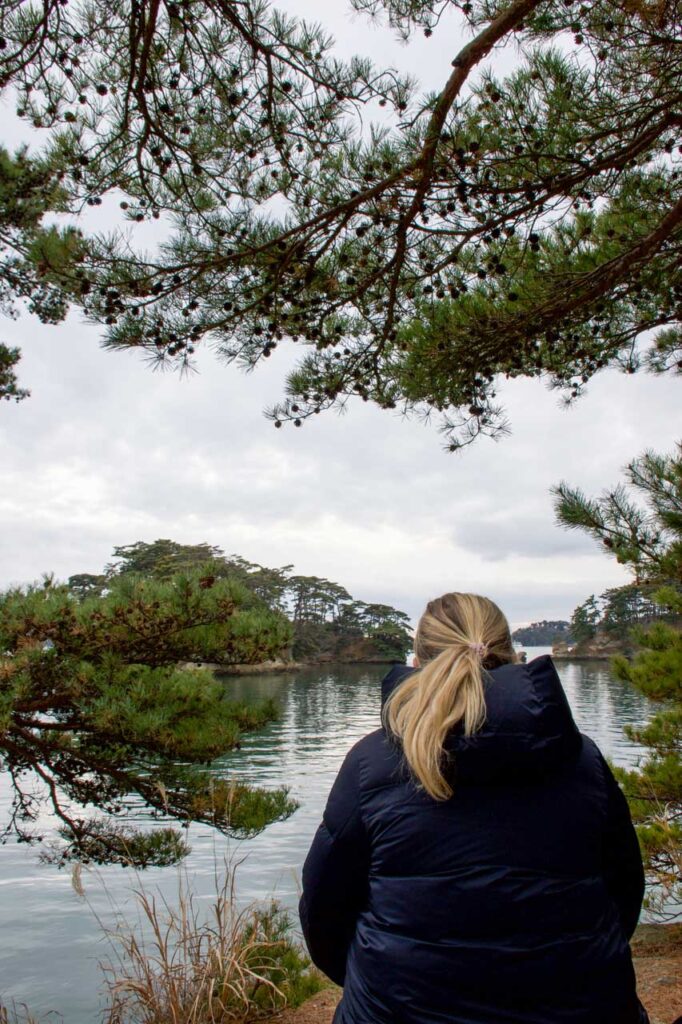
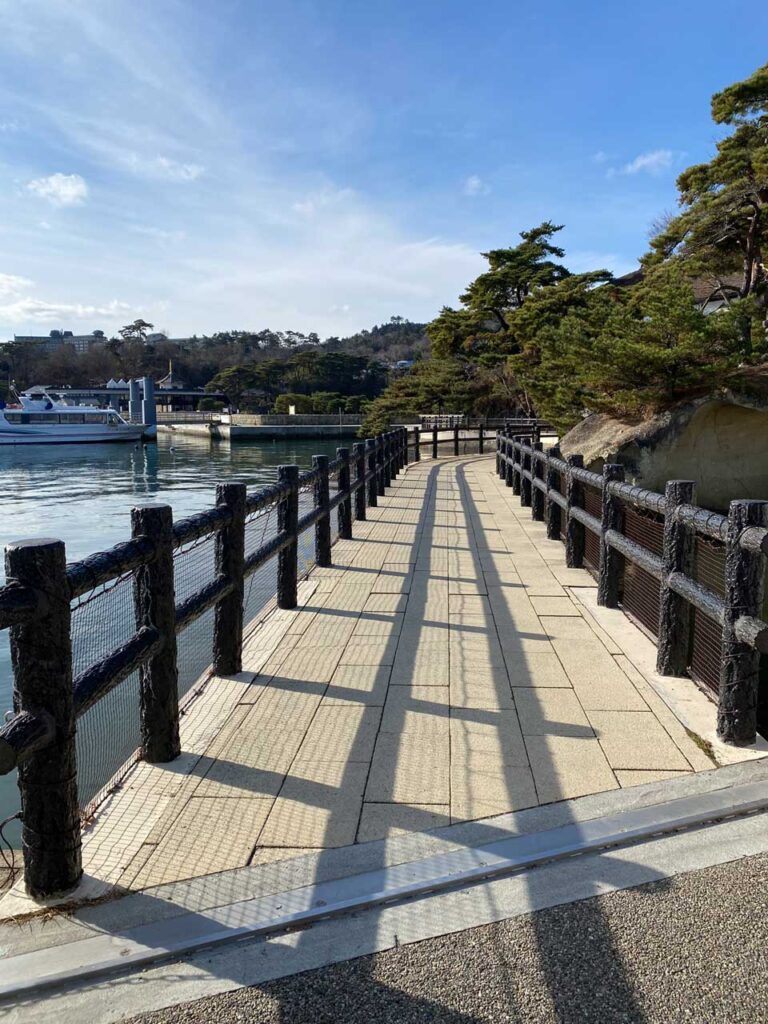
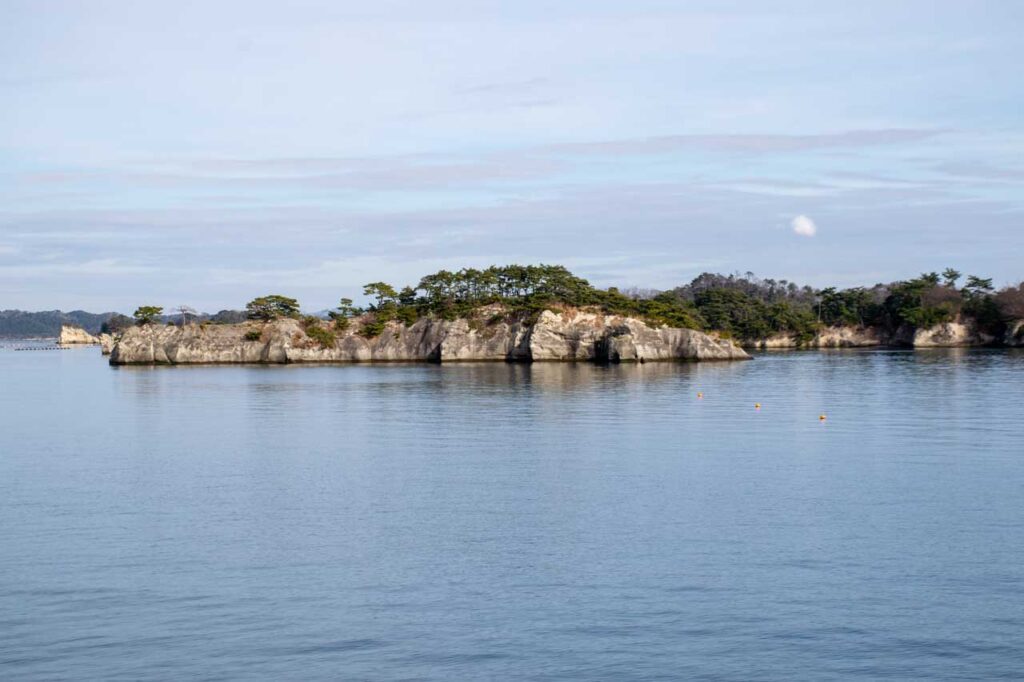
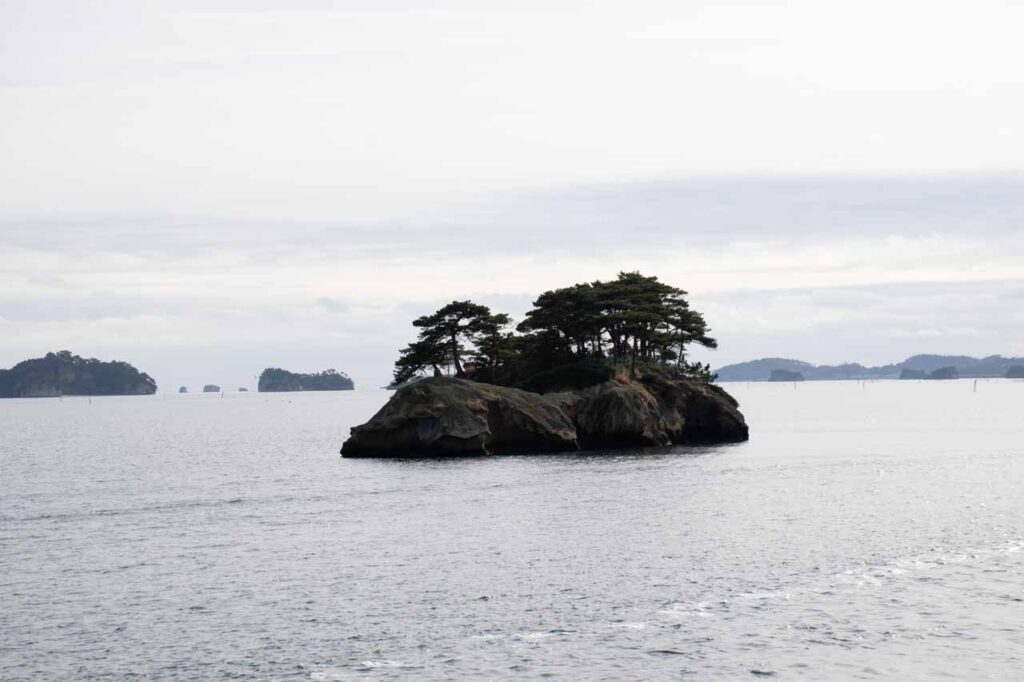
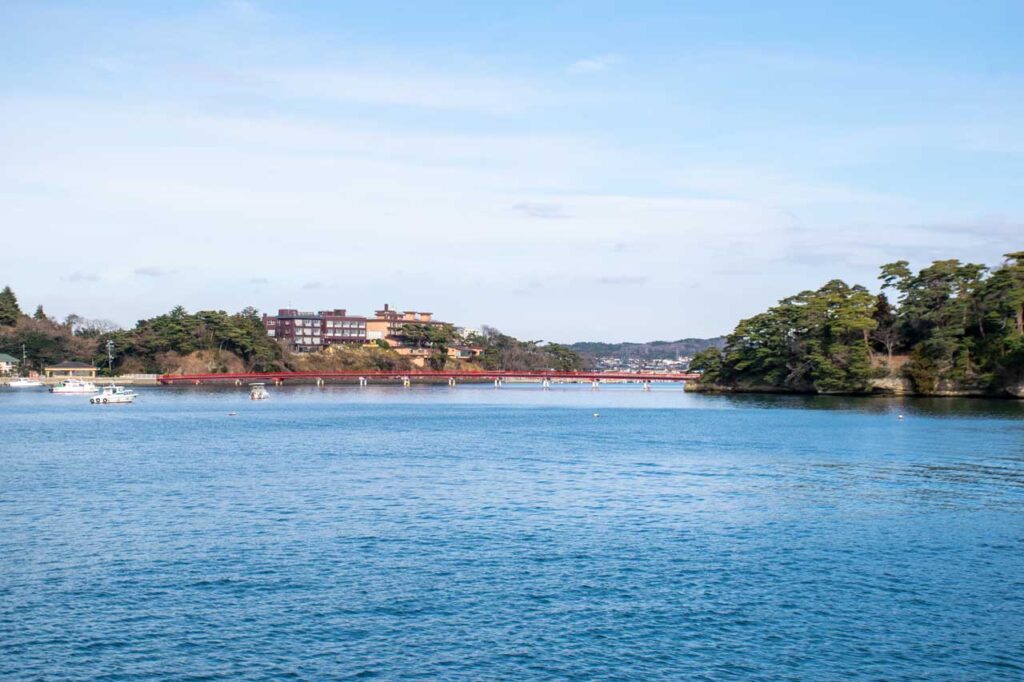
Matsushima

Matsushima is one of the easiest and most famous day trips from Sendai. It is known for its island-dotted bay, coastal scenery and relaxed sightseeing.

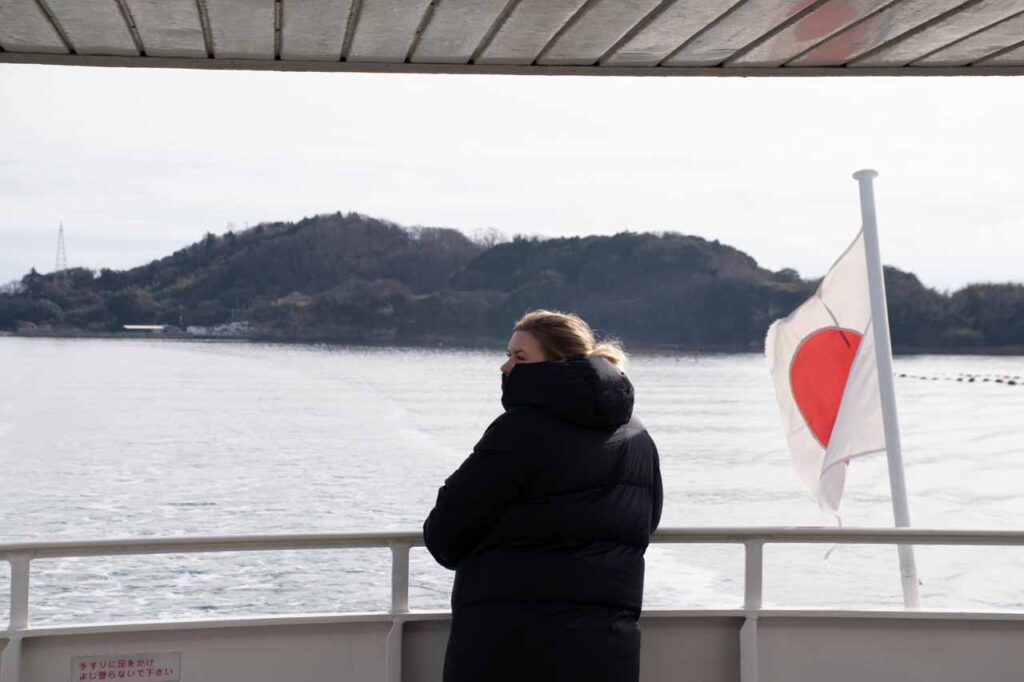
You can visit the Matsushima Island Tour Boat Pier and take a 50 minute boat trip around the bay. Ticket price is $1,000 Yen or more per person, and ticket purchase is CASH only. there is a prerecorded bilingual tour guide broadcast too, or keep things slower and wander around the waterfront.

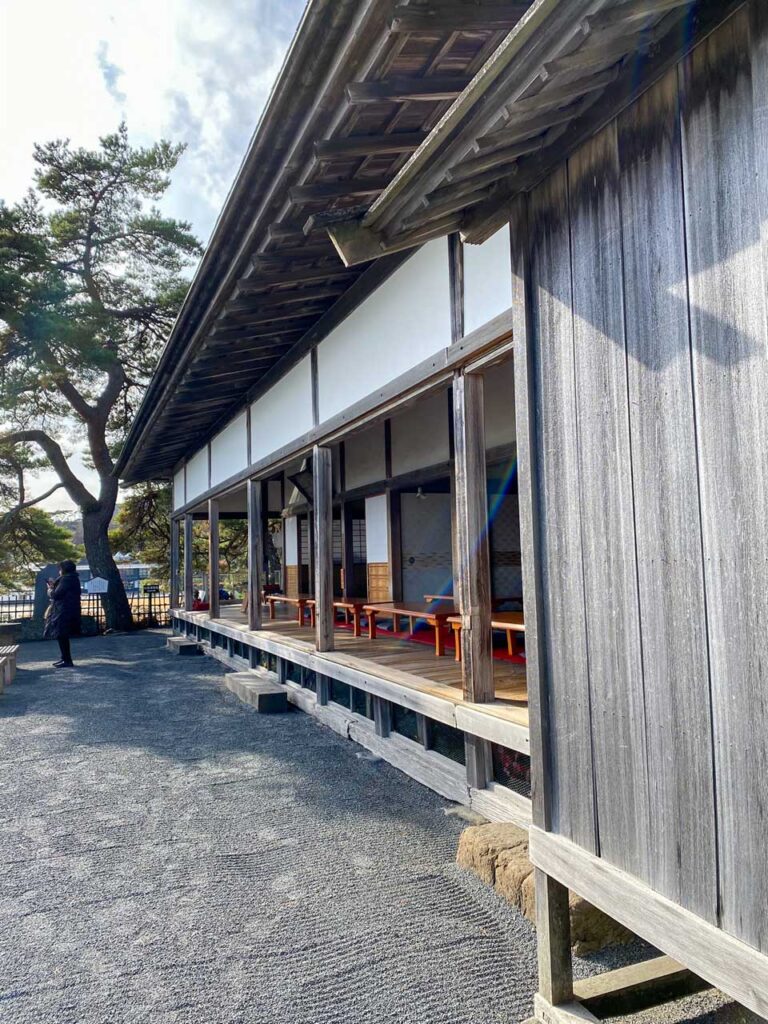
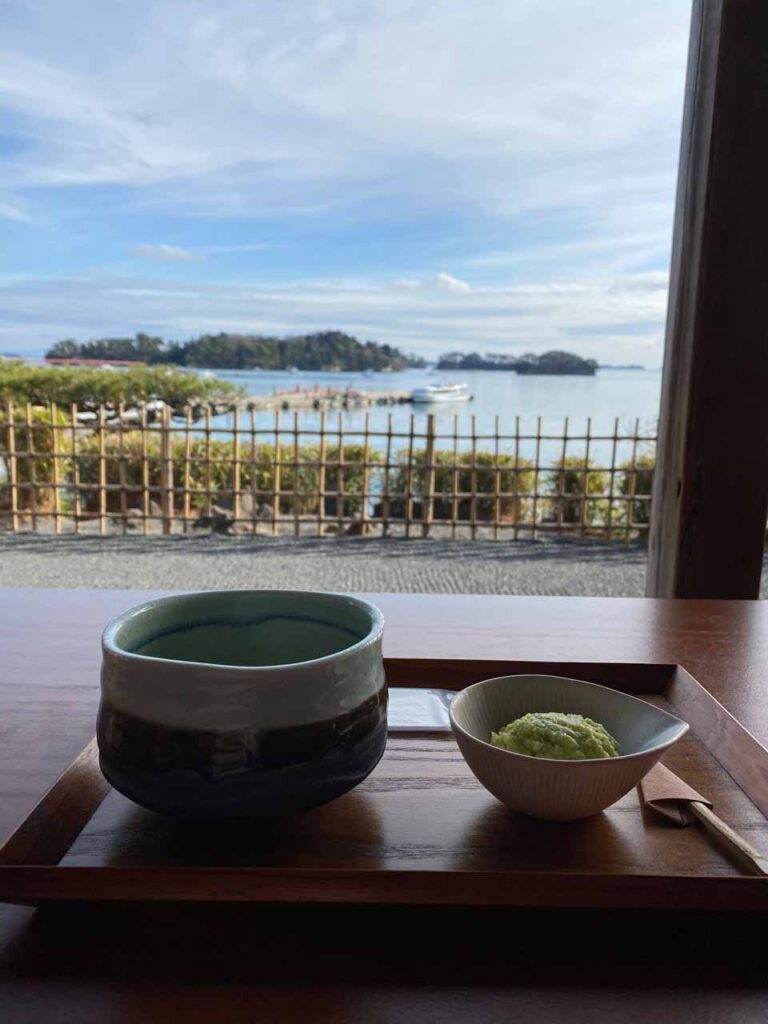
Kanrantei Tea House (Matsumshima)

Kanrantei Tea House is a lovely stop in Matsushima. It has views over the bay and works well as a slower break between walking, sightseeing and boat trips.

Matsushima
Matsushima
Kanrantei Tea House (Matsumshima)

Where to stay in Matsushima

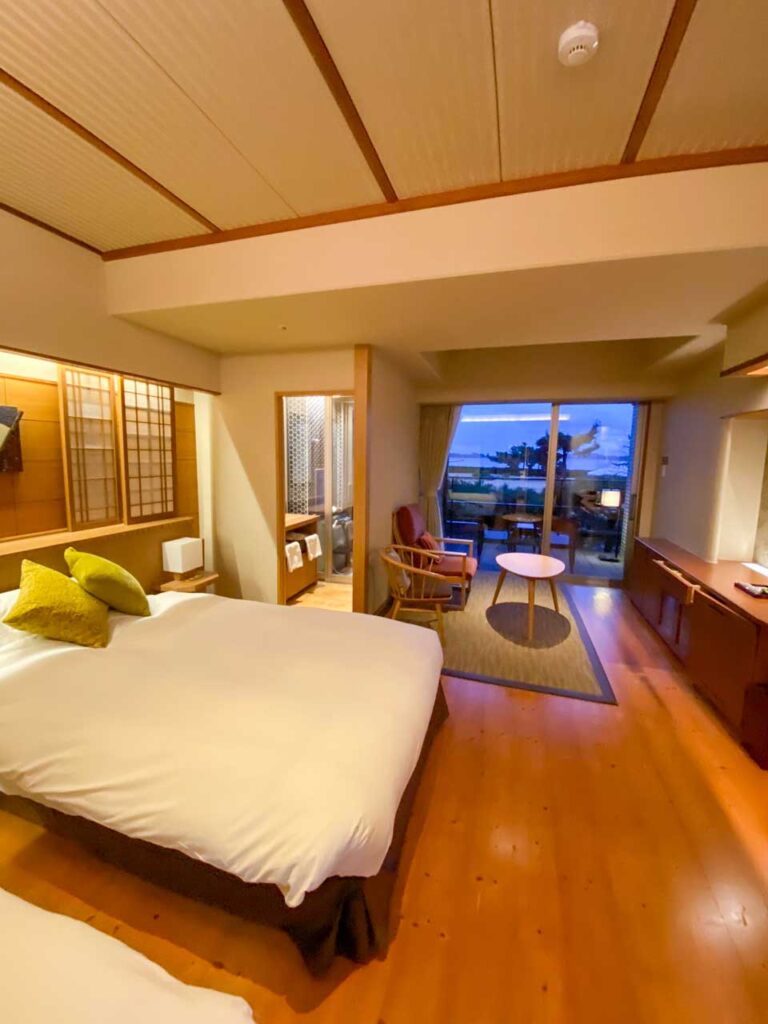
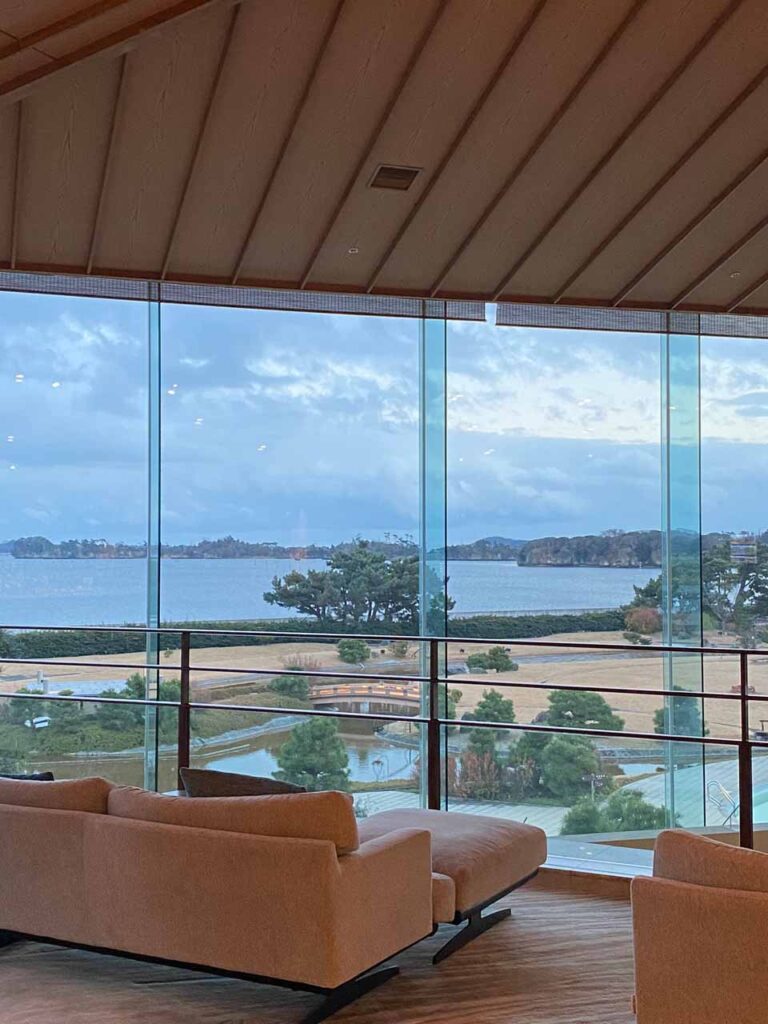
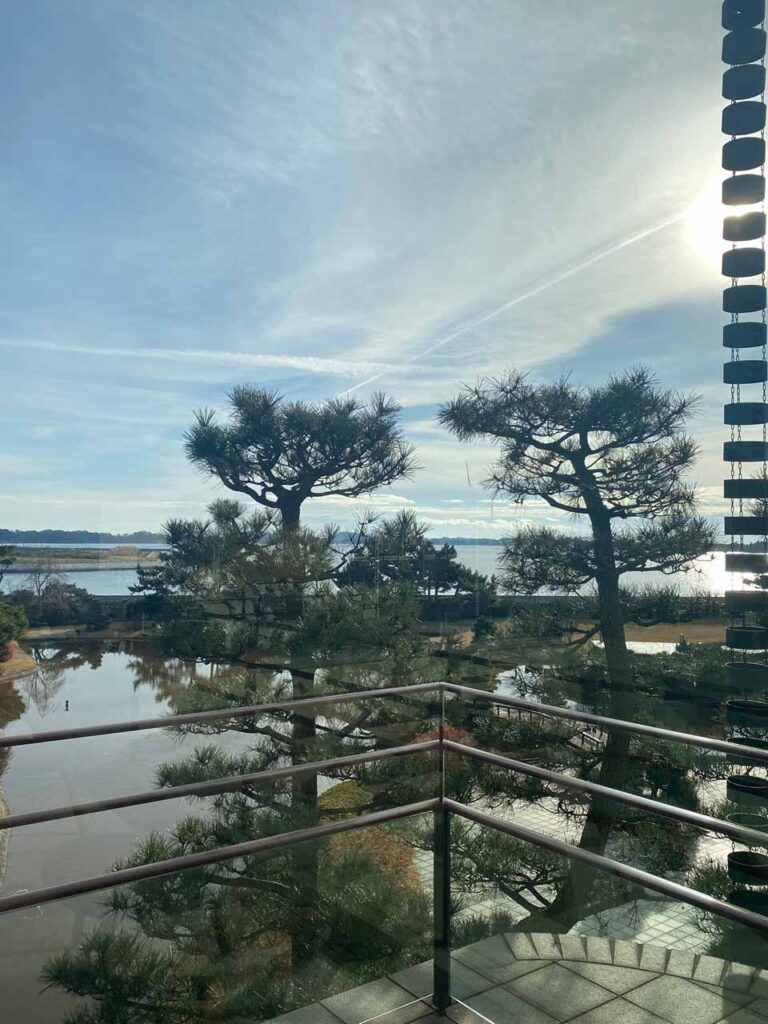
Matsushima Ichinobo

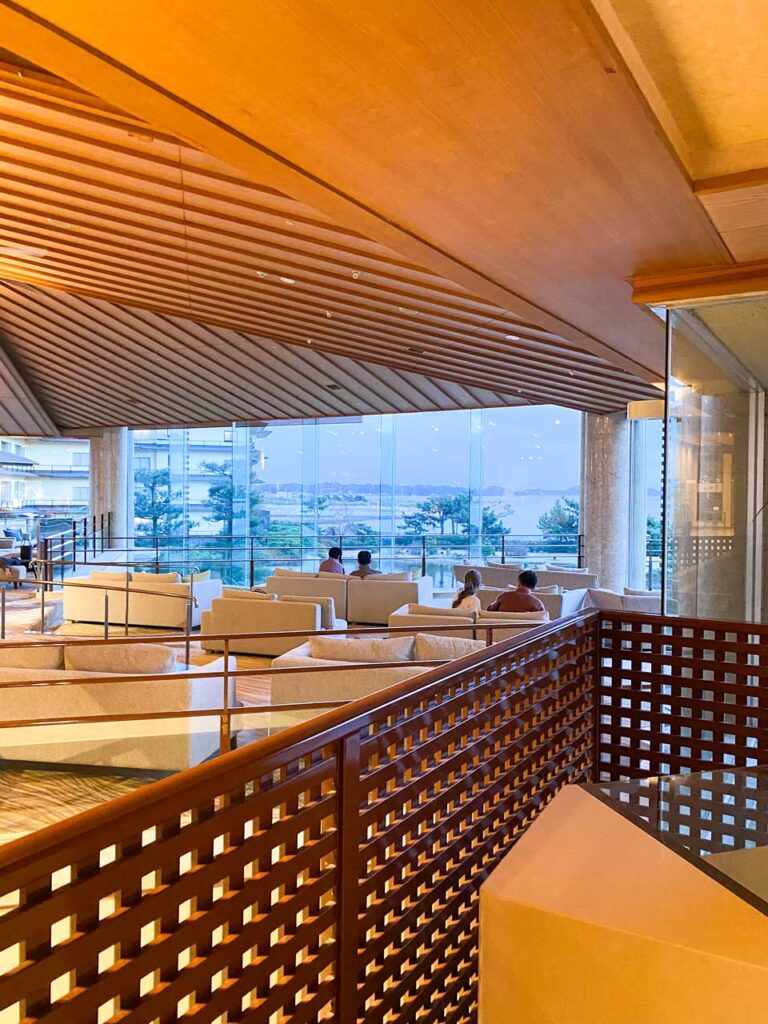
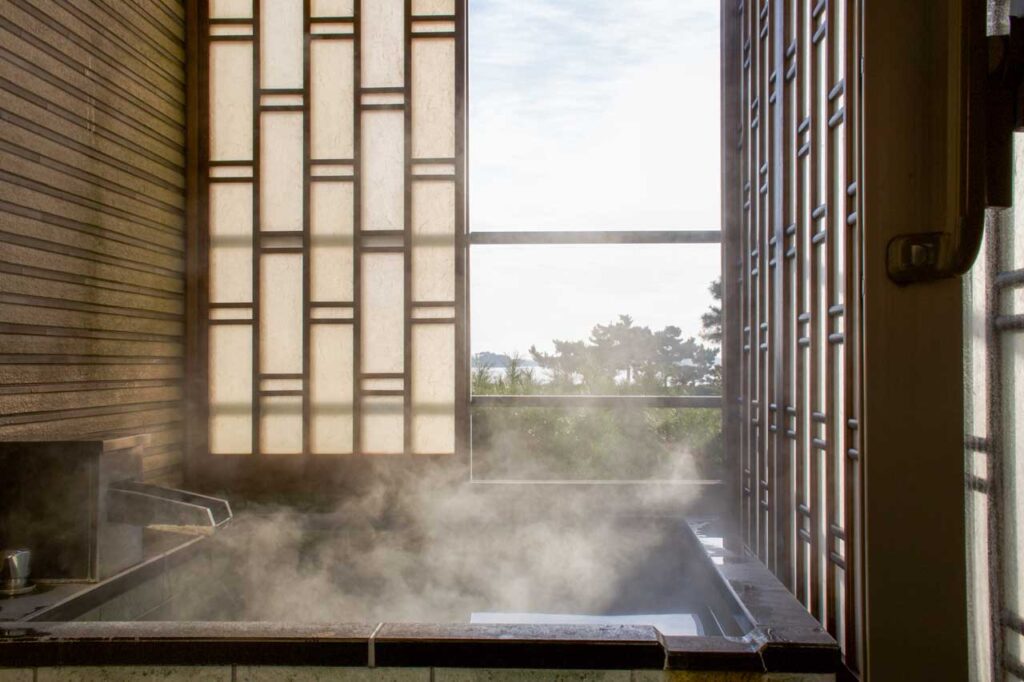
Matsushima Ichinobo is a beautiful onsen hotel in Matsushima and works well if you want to turn Matsushima into an overnight stay rather than a simple day trip from Sendai.

Staying overnight gives you more time to enjoy the bay after the day-trippers leave, and it makes Matsushima feel much calmer.

Onsen uniform at Matsushima Ichinobo
Matsushima Ichinobo
Matsushima Ichinobo
Matsushima Ichinobo
Matsushima Ichinobo
Matsushima Ichinobo
Matsushima Ichinobo

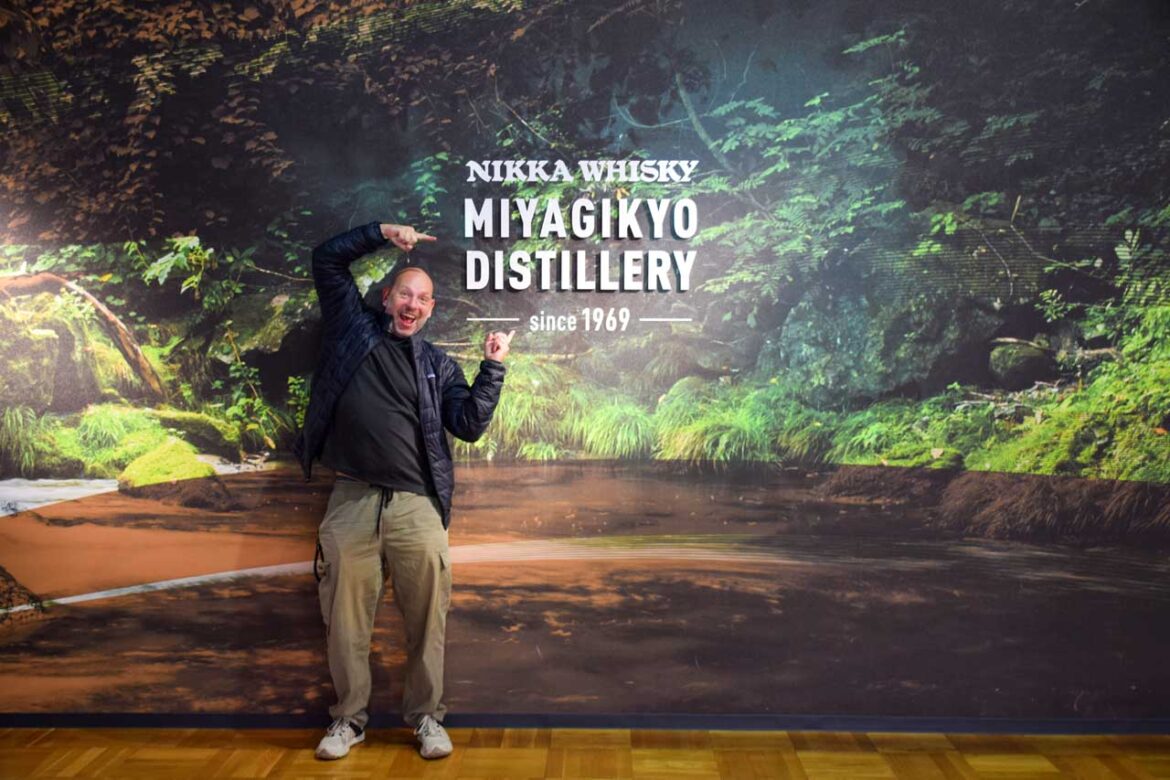
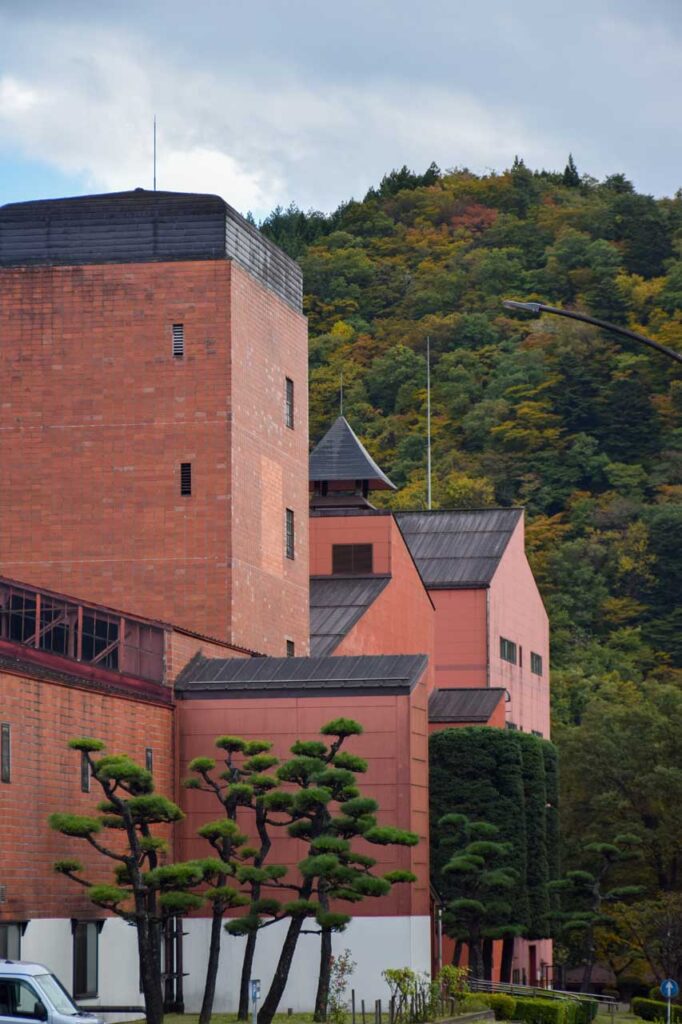
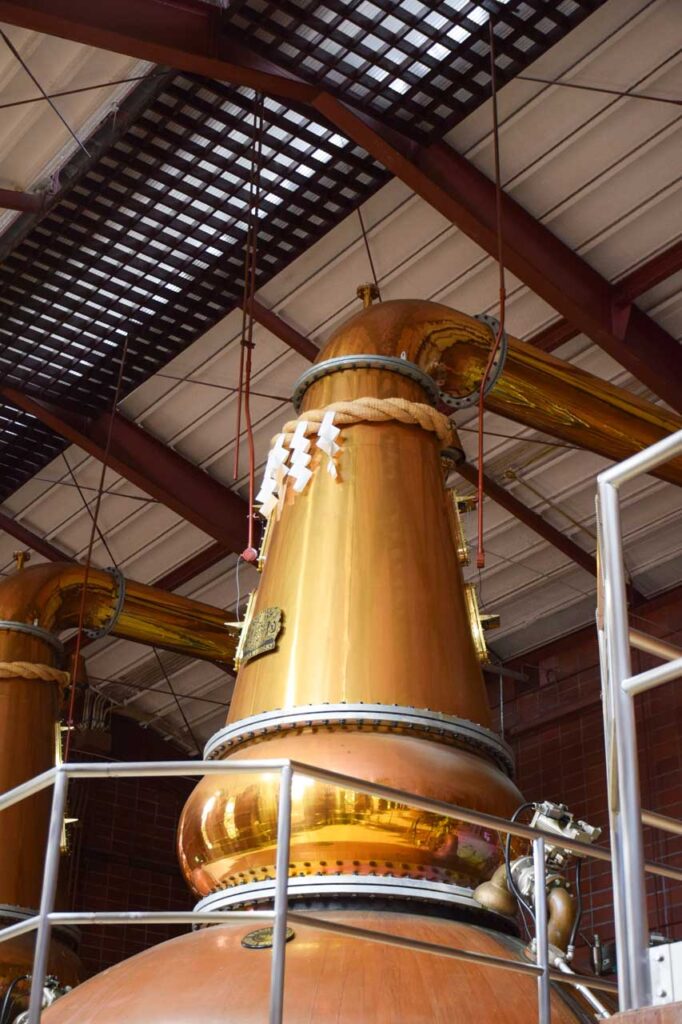
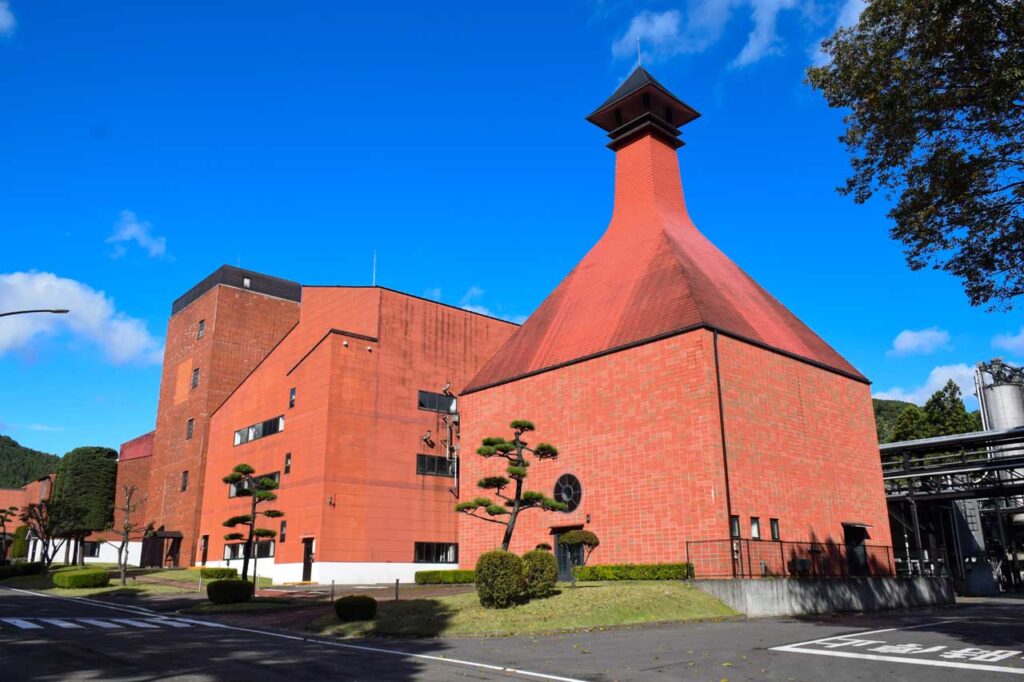
Nikka Whisky Miyagikyo Distillery (Sakunami)

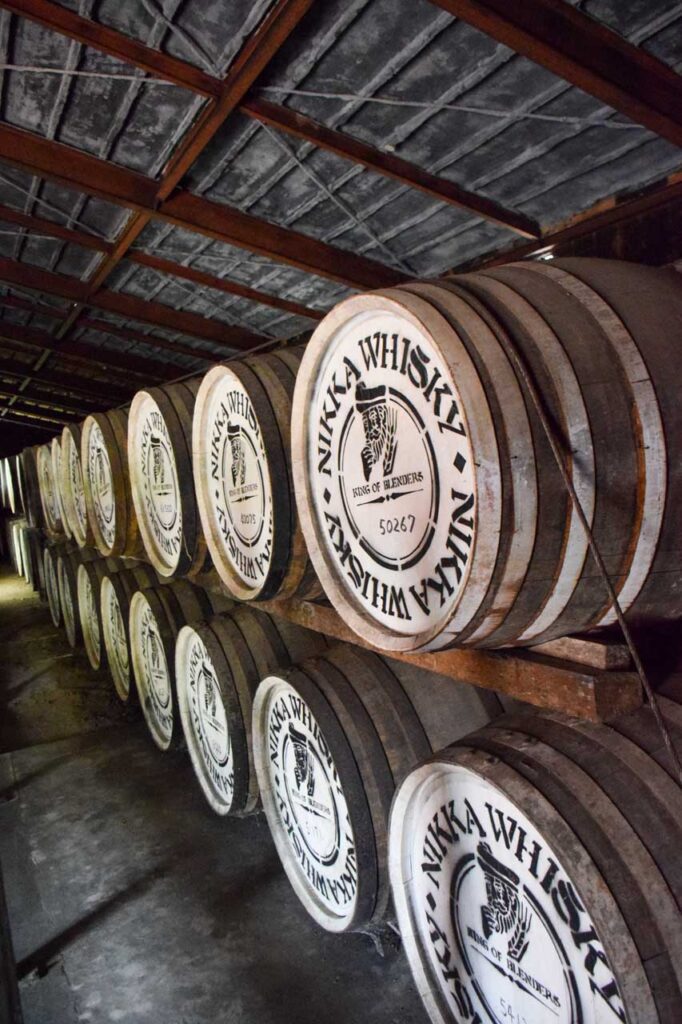
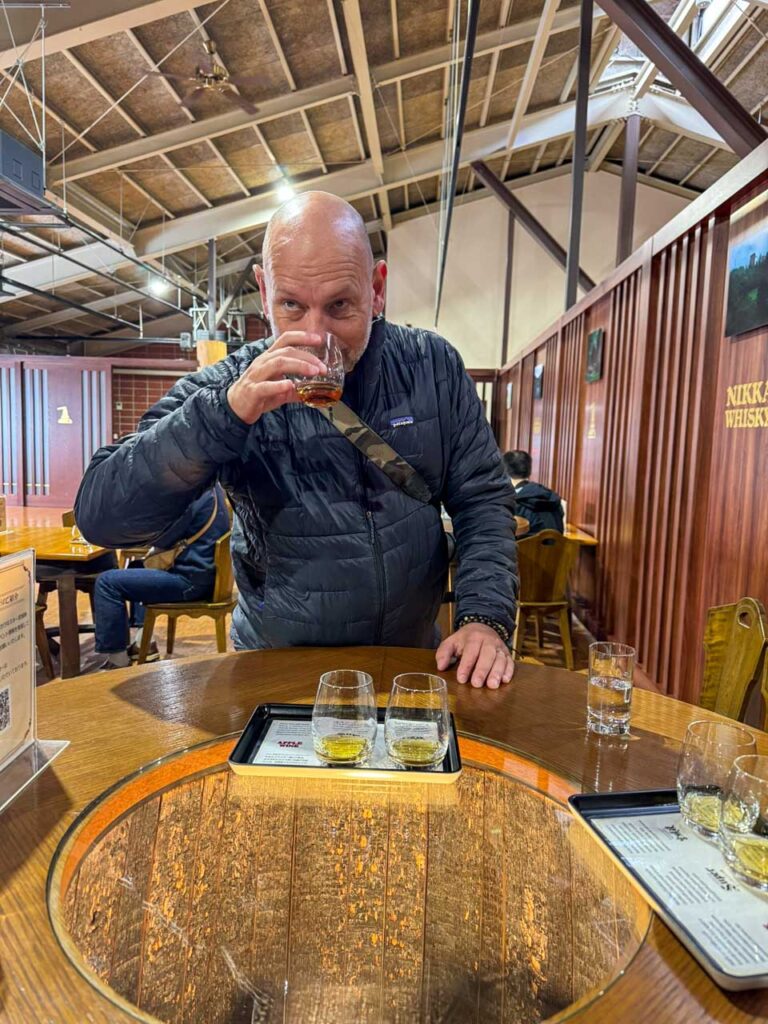
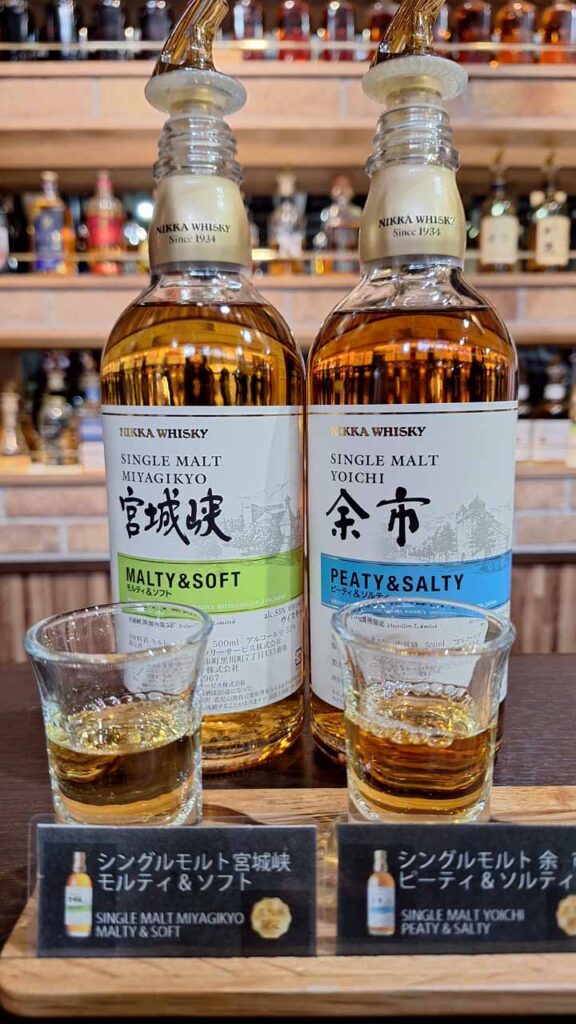
Nikka Whisky Miyagikyo Distillery is one of the best day trips from Sendai if you like whisky. There is no Engligh language tour, but you do get a pamphlet in English and there’s a great whisky tasting afterwards. It’s free, so you just need to book in advance on their website. They also have store exclusives too which are just amazing.

Take the JR Senzan Line from Sendai towards Yamagata and get off at Sakunami Station. From Sendai, the train takes around 40 minutes. From Sakunami, you can use the shuttle bus when it is running, take a taxi, or use the local bus depending on timing.

Your route notes:

  • Train: JR Senzan Line local towards Yamagata
  • Time: around 42 minutes
  • Stops: around 11
  • Platform: 7 at Sendai Station
  • Then bus: 840 / S840 towards Sendai Station for around 2 minutes, depending on the stop and timing

Book ahead if you want to do a tour, and do not assume taxis will be waiting at Sakunami Station.

Nikka Whisky Miyagikyo Distillery (Sakunami)

Where to stay in Sakunami

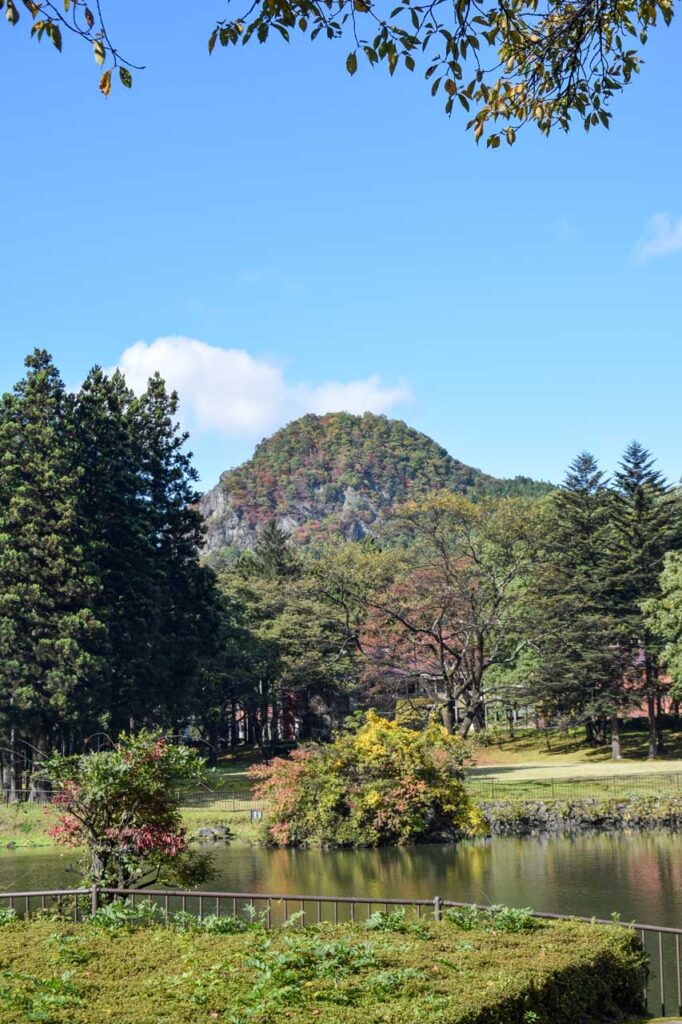
Sakunami Onsen

Sakunami Onsen is in the same general direction as Nikka Whisky Miyagikyo Distillery, so it can work well as part of a mountain day out from Sendai.

This is also one of the places where staying overnight can make more sense than rushing back to the city. If you like onsen towns and slower mountain stays, Sakunami is worth considering.

Sakunami Onsen uniform
Sakumani Onsen
Sakumani Onsen
Sakumani Onsen
Sakumani Onsen
Sakunami Onsen in the fall

Onsen and tattoos

If you have tattoos, ask the hotel directly before booking or when you arrive. Rules can vary, even for foreign visitors.

One option is to book a room with a private onsen, which avoids any uncertainty around the public baths. When we stayed, we also checked with staff about using the public onsen facilities and were given permission, but it is always best to ask rather than assume.

Risshaku-ji Temple, Yamadera

Risshaku-ji Temple, usually just called Yamadera, is another brilliant day trip from Sendai.

Take the train to Yamadera Station, then walk from there. The temple is built into the mountainside, so expect stairs and give yourself time. It is one of those places where the journey up is part of the experience.

In Yamadera, we also stopped at:

TsukiCoffee

Maidoya Shokudo

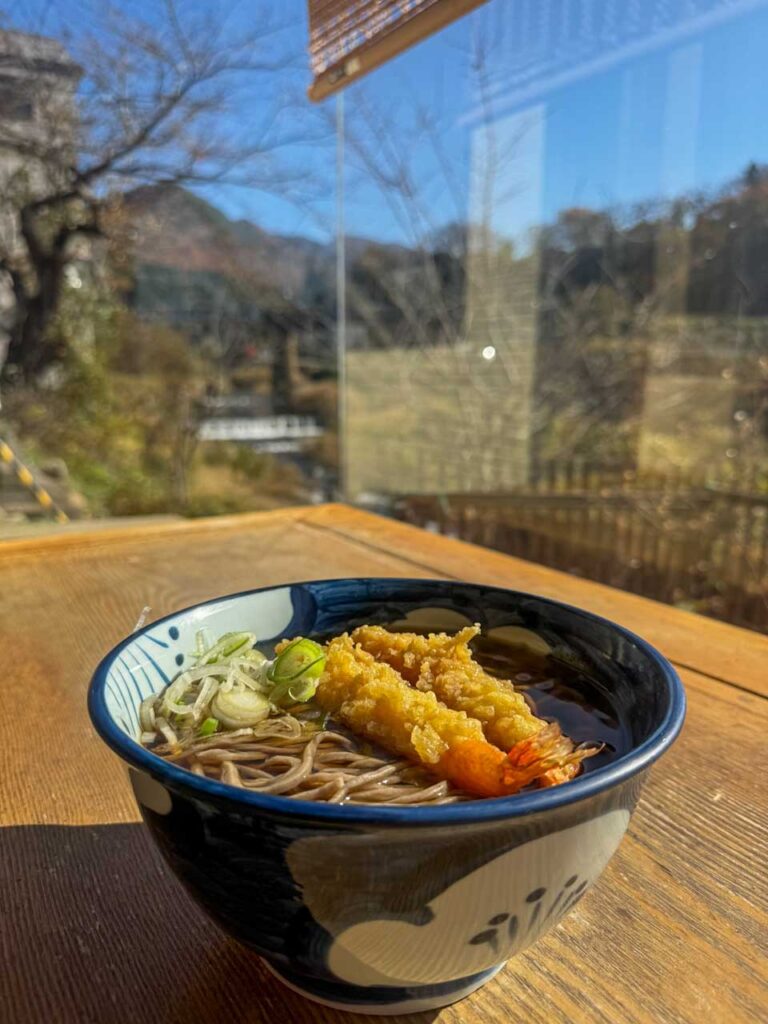
Maidoya Shokudo was a great stop for soba noodles with ebi tempura after exploring the temple area.

Risshaku-ji Temple, Yamadera
Maidoya Shokudo Soba, Yamadera

Final Thoughts on Day Trips from Sendai

Sendai makes day trips feel easy. That is one of the big reasons we like the city so much. You can stay in one place, use the trains well, and still reach the coast, mountains, onsen towns, whisky distilleries and historic temples without constantly packing and moving hotels.

Matsushima is the easiest choice if you want sea views, island scenery and a relaxed boat trip. Yamadera is the one to choose if you want something more atmospheric, with mountain views, temple stairs and that proper “this is why we came to Japan” feeling. Nikka Whisky Miyagikyo Distillery is a brilliant half-day trip if you enjoy whisky, especially with Sakunami Onsen nearby if you want to turn it into something slower.

For us, these trips are part of what makes Sendai such a good base. The city itself is practical, local and easy to enjoy, but the real magic is how much you can reach from it.

If you are planning a few days in the city first, start with our Sendai travel guide for where to stay, what to do, where to eat and why Sendai has become one of our favourite places in Japan.

September 7, 2026 0 comments
FacebookTwitterPinterestLinkedinRedditStumbleuponWhatsappTelegramThreadsOpenAIChatGPTEmail
Sam Downtown Sendai
Japan

The Sendai Travel Guide: Real Japan

by Sam September 7, 2026
written by Sam

Sendai is one of those places that slowly became important to us. We first went because of friends we met through our Paddington Instagram account, and since 2022 we’ve been back three times. That probably says more than any “top things to do” list could.

It is not classic first-trip Japan in the Tokyo, Kyoto or Osaka sense. Sendai is a real working city, with fewer tourists, excellent food, easy transport, and brilliant day trips into the mountains, coast and countryside. You can be looking out over the city from a free viewing platform in the morning, standing inside a giant white Kannon statue in the afternoon, and eating tempura, sushi or yakiniku with locals by evening.

Sendai is also surprisingly easy to reach. From Tokyo, the Shinkansen takes around 1.5 to 2 hours depending on the train, which makes it very doable as part of a wider Japan trip.

Why Visit Sendai?

For us, Sendai is personal. We visit because of our dear friends, ‘Bob and Kevin’, who have been incredibly kind to us and somehow made Sendai feel like home. They treat us like family, although Livia may argue she is treated slightly more like a princess, and they have shown us a side of the city we never would have found alone. With them, we have eaten amazing food at home and in restaurants, learned what is in season, where to go, and when to enjoy it. Very Japanese really: thoughtful, generous, and somehow still everything in moderation.

Even without that connection, though, we think Sendai is one of the best cities in Japan for travellers who want somewhere less touristy and more local.

It is still a city, of course. You are not stepping into a hidden village. But Sendai gives you access to a different kind of Japan. You have proper shopping, great restaurants, easy trains, forest parks, mountain temples, onsen towns, whisky distilleries and the coast all within reach.

It also makes a strong base for day trips. From Sendai, you can visit Matsushima, Yamadera, Sakunami Onsen and Nikka Whisky Miyagikyo Distillery without needing to change hotels every night. See our Day trips from Sendai post

Dinner at home in Sendai
Home dinner in Sendai
Home dinner hotpot
Home dinner hotpot

Where We Stayed in and Around Sendai

Hotel Metropolitan Sendai East

Hotel Metropolitan Sendai East is the most convenient place we’ve stayed in Sendai. It is connected to Sendai Station, which makes it ideal if you are arriving by Shinkansen, taking day trips, or just want everything to be easy.

For a first visit, this is probably the simplest option. You are right by trains, shops, restaurants and transport links.

Sendai Royal Park Hotel

Sendai Royal Park Hotel is a very different kind of stay. It is further out of the centre, quieter, and feels more like a relaxed hotel escape than a city base.

This works better if you have already seen central Sendai, have friends locally, or want something calmer. For first-time visitors relying on trains and buses every day, staying near Sendai Station is more practical.

Things to Do in Sendai

Visit Sendai Dai Kannon

Sendai Dai Kannon is one of the most memorable things to see in Sendai. Also known as the White-Robed Colossus, this enormous white Kannon statue stands above the city and can be seen from all over the area.

It is not just something you look at from outside. You can actually go inside.

Admission to the interior was ¥500 when we visited. Inside, the statue is divided into 12 levels, with an elevator taking you up before you walk down through the different floors. There are 108 Buddha statues inside, and the whole experience is stranger, calmer and more impressive than we expected.

To get there from Sendai Station, we took a bus from the west side of the station. Look for services towards the Sendai Dai Kannon area, including routes such as 815, 825 or X910 depending on timing. The stop you want is Sendai Daikannon-mae.

Your route notes:

  • Bus: 910 / S910 towards Izumi Village 4-chome
  • Time: around 39 minutes
  • Stops: around 23
  • Platform: 19 at Sendai Station west side

Check the bus times on the day, because this is not a turn-up-and-go-every-five-minutes route.

Sendai Dai Kannon
Sendai Dai Kannon
Model of the Sendai Dai Kannon
Inside Sendai Dai Kannon

Visit Sendai Castle Ruins

Sendai Castle Ruins, also known as Aoba Castle Ruins, are one of the classic Sendai sights.

There is not a full castle here anymore, so do not go expecting a Himeji-style moment. The reason to visit is the view, the history and the statue of Date Masamune overlooking the city.

The easiest way to get close is to take the subway to International Center Station, then walk up from there. It is a good short outing and pairs well with other central Sendai stops.

Equestrian Statue of Date Masamune
Sendai Castle Ruins
Sendai Castle Ruins

Go Up to the Free AER Viewing Platform

AER is one of the easiest little wins in Sendai. It is close to Sendai Station, free to visit, and has a viewing area on the 31st floor.

Head towards the office entrance of the AER building and look for the elevators to the top floor. From there, you get views in several directions across the city.

The windows cover the whole viewing area, so reflections can be annoying if you are taking photos. If you want cleaner shots, bring something dark to block reflections around your lens. Even if you only stay for 15 or 20 minutes, it is worth popping up there.

Shop Around PARCO Sendai

PARCO Sendai is an easy place for shopping near the station. If you like cute Japan things, character shops and pop culture bits, it is dangerous in the best way.

We found Mofusand, Pokémon, Gundam and all kinds of things we absolutely did not need but very much wanted.

Visit Sendai Mitsukoshi

Sendai Mitsukoshi is good for department store browsing, especially the basement food floor.

It is a nice place to look for food gifts, sweets and beautifully packaged things to take home. They also had a good range of cookware and porcelain when we visited, including hashi and hashi oki, which are chopsticks and chopstick rests.

The top floor often has specialist food events or temporary exhibitions, so it is worth checking if you are already nearby.

Street view of Sendai Dai Kannon
Robot dance at PARCO Sendai
Kanahebisui Shrine in Sendai's Ichibancho district
Kanahebisui Shrine
in Sendai’s Ichibancho district
Sendai light festival

BAPE STORE Sendai

If you are into streetwear, BAPE STORE Sendai is another one for the list. Not essential Sendai sightseeing, obviously, but very much one of those stops Sam was not going to miss. Like all BAPE stores in Japan they will have store exclusives.

Dainohara Forest Park

Dainohara Forest Park is a nice green escape north of the city centre. You can reach it from Asahigaoka Station, making it easy to visit by subway.

It is a good option if you want a slower walk, a break from shops and streets, or just a bit of everyday local Sendai.

Hitachi Systems Hall Sendai

Hitachi Systems Hall Sendai is also near Asahigaoka Station, close to Dainohara Forest Park.

They have regular performances, including concerts by the philharmonic orchestra, and tickets can be surprisingly affordable. If you enjoy live music, it is worth checking what is on while you are in Sendai.

Devellope Hair Salon and Head Massage

Livia also went to Devellope for a haircut and Sam had a head massage, which is apparently still worthwhile even if you are bald.

Google Maps: Devellope Hair Salon

Devellope Hair Salon Sendai
Hitachi Systems Hall Sendai
Dainohara Forest Park

Where to Eat in Sendai

We have been thoroughly spoiled in Sendai because our friends live there. That means we have eaten in places we probably would not have found as easily on our own.

Kappou Tempura Santaro

Kappou Tempura Santaro is an upscale Japanese restaurant and one of the more special meals we had in Sendai.

Japanese name: 割烹 天ぷら 三太郎

Expect proper tempura, beautifully prepared Sendai beef and a more refined meal than your everyday izakaya dinner. The offer sukiyaki or hotpot dining and the staff in kimonos will actually prepare the food for you at the low table kneeling down. It’s here we first tried fugu/Japanese pufferfish (Chefs in Japan must train for three or more years before they get a license to prepare fugu.) expect to pay upwards of ¥10,000 per person.

Kappou Tempura Santaro
Fugu at Kappou Tempura Santaro
Dinner service at Kappou Tempura Santaro
Sendai Waygu
Sendai Waygu

A quick note on Sendai beef and wagyu grading

Japan’s official wagyu quality grades only go up to A5, Sendai beef is known for being top-tier wagyu, with very high marbling standards, which explains why it can feel even more luxurious than regular A5 beef.

Datemachi Misato

Datemachi Misato is a great izakaya.

Japanese name: だてまち海里

This is exactly the kind of place that makes visiting friends in Japan so good. You get taken somewhere local, relaxed and full of things you probably would not have ordered confidently by yourself the first time. Expect beutifully prepared, high quality seasonal dishes with very friendly service. They also have a great range of sake.

Datemachi Misato
Datemachi Misato
Sake at Datemachi Misato
Datemachi Misato
Datemachi Misato
Datemachi Misato
Datemachi Misato
Datemachi Misato
Datemachi Misato
Datemachi Misato
Datemachi Misato
Datemachi Misato
Datemachi Misato

Umai Sushikan Yutorogi Izumi

Umai Sushikan Yutorogi Izumi is a bit out of town, but we really liked it.

Japanese name: うまい鮨勘 ゆとろぎ泉店

It is old-school conveyor belt sushi, but higher quality than the quick budget chains. If you have transport or local friends helping you get there, it is worth adding to the list.Yakiniku Jajamaru Matsumori

Ushiiii! Sam loves Sushi
Umai Sushikan Yutorogi Izumi

Yakiniku Jajamaru Matsumori

Yakiniku Jajamaru Matsumori is our favourite Friday night yakiniku restaurant in Sendai.

Japanese name: 焼肉じゃじゃまる 松森店

It is also a bit far out, but the quality is excellent. The tongue and Sendai beef are especially good, and this is one of those meals that now feels tied to Sendai for us.

Yakiniku Jajamaru Matsumori
Friday night at Yakiniku Jajamaru Matsumori

How Many Days Do You Need in Sendai?

2 Days

Two days gives you enough time to see central Sendai, visit Sendai Castle Ruins, go up to the AER viewing platform, eat well and maybe fit in Sendai Dai Kannon.

3 Days

Three days is better if you want to add one day trip, such as Matsushima, Yamadera or Nikka Whisky Miyagikyo Distillery.

4+ Days

If you have four days or more, Sendai becomes a really useful base. You can slow down, see the city properly, visit friends if you have them, and take multiple day trips without changing hotels every night.

For us, Sendai is a repeat city. We have been three times since 2022, and we would still go back.

Practical Tips for Visiting Sendai

Stay near Sendai Station if it is your first visit. It makes day trips and transport much easier.

Use the Shinkansen from Tokyo if you are short on time. Sendai is much closer than it looks on a map.

Check bus times carefully for Sendai Dai Kannon. The journey is easy enough, but not every route runs constantly.

Book Nikka Whisky Miyagikyo Distillery ahead if you want a proper tour.

Ask onsen hotels about tattoos before booking. Do not assume, even as a foreign visitor.

Bring a black cloth or dark jacket if you want better photos from the AER viewing platform. It helps reduce window reflections.

Do not treat Sendai like a checklist city. Its real strength is how normal, local and easy it feels.

Final Thoughts on Sendai

Sendai is not the obvious Japan city everyone talks about, and that is exactly why we like it. It feels lived-in rather than staged, practical rather than polished, and local in a way that many first-time Japan routes never quite reach.

We first came because of friends, but we keep going back because Sendai has become one of our favourite bases in Japan. It has food, shopping, quiet parks, strange sights like the giant Kannon, and easy access to places like Matsushima, Yamadera, Sakunami and Nikka Whisky.

If you want a less touristy side of Japan that still has great transport, excellent food and plenty to do nearby, Sendai is absolutely worth adding to your trip.

If you are using Sendai as a base, we’ve also written a separate guide to the best day trips from Sendai, including Matsushima, Yamadera, Nikka Whisky Miyagikyo Distillery and Sakunami Onsen.

September 7, 2026 0 comments
FacebookTwitterPinterestLinkedinRedditStumbleuponWhatsappTelegramThreadsOpenAIChatGPTEmail
Exterior of NP Arts Center in Kigali
RwandaUncategorized

A Self-Guided Art Walk in Kigali: Exploring Kacyiru’s Art Centres

by Livia September 5, 2026
written by Livia

Kigali has a lively contemporary art scene, with several art centres and creative spaces clustered around Kacyiru, just north of Kimihurura.

While staying in Kimihurura, we put together our own self-guided art walk through the area. We took a moto to Niyo Arts Center and then made our way back on foot, stopping at different art spaces along the way.

Our Kigali Art Walk Route

Optional Starting Point: Impundu Arts Center

We only heard about Impundu Arts Center after doing our art walk, but if we were planning the route again, this is where we’d start. The centre showcases work exclusively by female artists, which sounds well worth a visit.

It’s also close to Niyo Arts Center, where we started our walk, so it’s easy to add without changing the route much.

1. Niyo Arts Center

Niyo Arts Center was where we started our art walk and a great place to begin the morning. The centre is colourful and welcoming, with several rooms filled with work by local artists.

There’s also a nice café, making it a good spot to grab breakfast or a coffee before setting off. Everyone we met here was incredibly friendly, and we spent around 30 minutes looking around before continuing.

Entrance to Niyo Arts Center in Kacyiru, Kigali
Cafe at Niyo Arts Center in Kacyiru, Kigali

2. Inkingi Arts Space

From Niyo, it’s around a 15-minute walk to Inkingi Arts Space.

There’s plenty to browse here, but as with most of the art spaces on this route, how long you spend really depends on what catches your eye. We spent around half an hour at some stops, while others were much quicker visits.

Entrance to Inkingi Arts Space in Kacyiru, Kigali
street art at Inkingi Arts Space in Kacyiru, Kigali

3. MADS Kigali

MADS Kigali doesn’t have the same colourful exterior as some of the other art centres along the route, but don’t let that put you off. Inside, the art is quite different from what we saw elsewhere, with some really distinctive and unusual pieces. We really enjoyed this stop.

It does require a small detour. The road doesn’t continue through towards the next stop, so after visiting MADS you’ll need to retrace your steps for a short distance before continuing the walk.

Entrance to MADS Kigali during our Kigali art walk

Optional Stop: Touch of Rwanda

Touch of Rwanda isn’t an art centre, but it’s conveniently located along the route and worth popping into while you’re passing.

There are seamstresses here who can make clothes for you, as well as locally made pieces to browse and buy. If you’re staying in Kigali for a few days, you could also arrange to have something made and return to collect it later.

4. NP Arts Center

Continue towards NP Arts Center, which you’ll find along a dirt road.

It’s another easy stop to add to the route, and you won’t have far to walk afterwards as the next art centre is almost opposite.

Exterior of NP Arts Center in Kigali

5. Ishyuka Arts

Ishyuka Arts is very close to NP Arts Center and was the final art centre we visited on our walk.

We had arrived at Niyo at around 10am and reached Ishyuka at approximately 1:30pm. By this point, after several hours of walking around Kigali in the sun, we were getting seriously hot and decided this was enough art for one day.

Entrance to Ishyuka Arts in Kacyiru, Kigali

6. Inema Arts Center

If you still have the energy, continue along the dirt road towards Inema Arts Center.

We had planned to include Inema in our walk but were simply too hot by this point and decided to skip it. It’s also the only art centre on this route that charges an entrance fee, which apparently includes a coffee.

After Inema, you can jump on a moto back to your accommodation or continue walking towards Kimihurura for lunch or dinner.

How Long Does the Kigali Art Walk Take?

We arrived at Niyo Arts Center at around 10am and finished at Ishyuka at approximately 1:30pm, so the part of the route we walked took us around three and a half hours.

If you add Impundu at the beginning, visit Inema and walk all the way back to Kimihurura, we’d allow around five hours in total. That should give you enough time to look around each art centre, stop for a coffee and walk between them without rushing.

How long you spend at each stop will vary. We spent around 30 minutes at some, while others were quick 10-minute visits.

If you don’t want to visit them all, we’d concentrate on the first half of the route. We found the art more interesting towards the beginning of the walk, so Niyo, Inkingi and MADS would be our picks if you only have a couple of hours.

Tips for Doing the Kigali Art Walk

  • Start early. We started at 10am, but we’d recommend going earlier. It gets hot once you reach the middle of the day.
  • Wear comfortable shoes. You’ll be doing quite a bit of walking, including along some dirt roads.
  • Bring water. You’ll definitely want it as the day gets hotter.
  • Carry some cash. It’s useful for smaller purchases and for grabbing a moto if you decide you’ve walked enough.
  • Don’t feel like you need to complete the whole route. Motos are everywhere, so it’s easy to stop whenever you’ve had enough.

Is Kigali’s Art Walk Worth Doing?

If you’re staying in Kimihurura or Kacyiru, this is an easy way to spend half a day seeing some of Kigali’s independent galleries and creative spaces.

Taking a moto to the furthest point and then walking back means there’s no need to arrange transport between every stop, and most of the galleries are relatively close together. You can follow the whole route, choose just a few galleries or call it a day whenever the heat gets too much and grab a moto back.

We really enjoyed the walk, saw some great art and met genuinely lovely people at every stop along the way. It ended up being a really nice way to spend a morning in Kigali.

colorful wall at NP art center
Artwork on display at Ishyuka Arts in Kigali
Streetart and views at Inkingi Arts Space in Kacyiru, Kigali
September 5, 2026 0 comments
FacebookTwitterPinterestLinkedinRedditStumbleuponWhatsappTelegramThreadsOpenAIChatGPTEmail
Sunset over central Windhoek with Christuskirche and the surrounding hills
Namibia

Windhoek Travel Guide: Is Namibia’s Capital Worth Visiting?

by Livia September 1, 2026
written by Livia

Windhoek is often treated as little more than the starting point for a trip around Namibia. Most travellers fly in, pick up a rental car or join a tour and head straight for the desert, national parks and dramatic landscapes the country is famous for.

And, to be fair, if you’re visiting Windhoek purely as a tourist, you probably don’t need very long here.

The main sights can easily be explored in a day or two, but after spending more time in the city, we found there was another side to Windhoek. There are some interesting historical sights, surprisingly good restaurants, relaxed places for drinks and several areas that are easy to settle into.
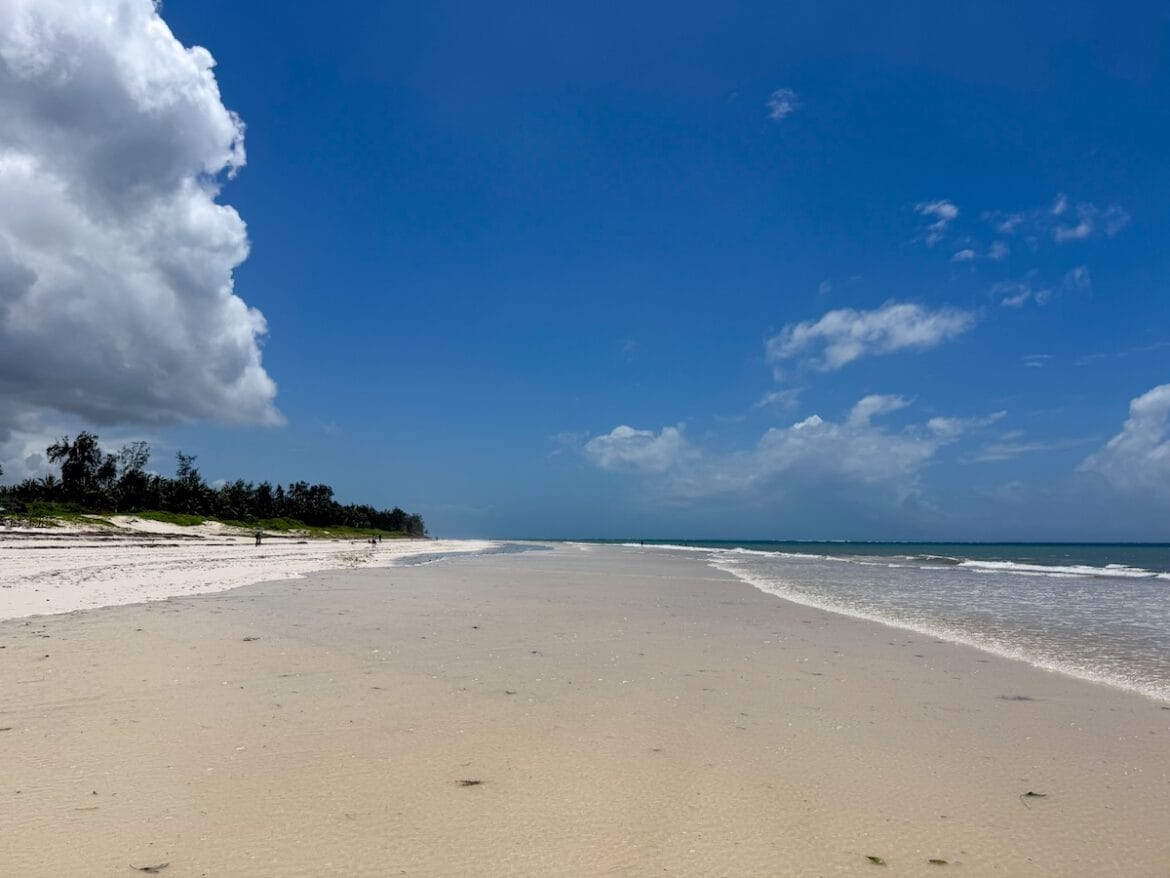
So, is Windhoek worth visiting? Yes, but how long you should stay depends very much on how you’re travelling.
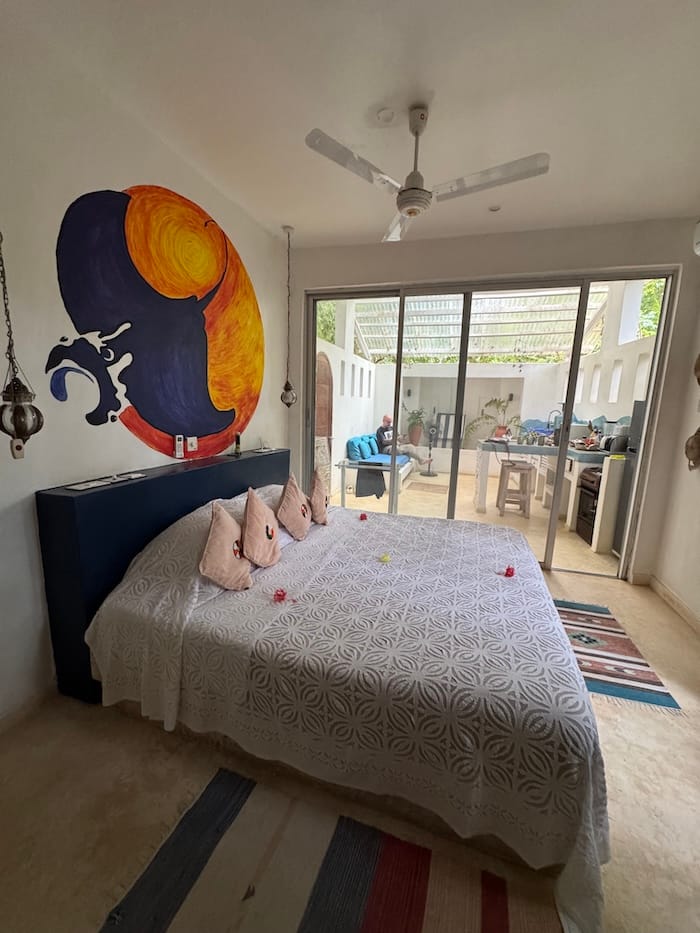
Where to Stay in Windhoek

Chameleon Backpackers

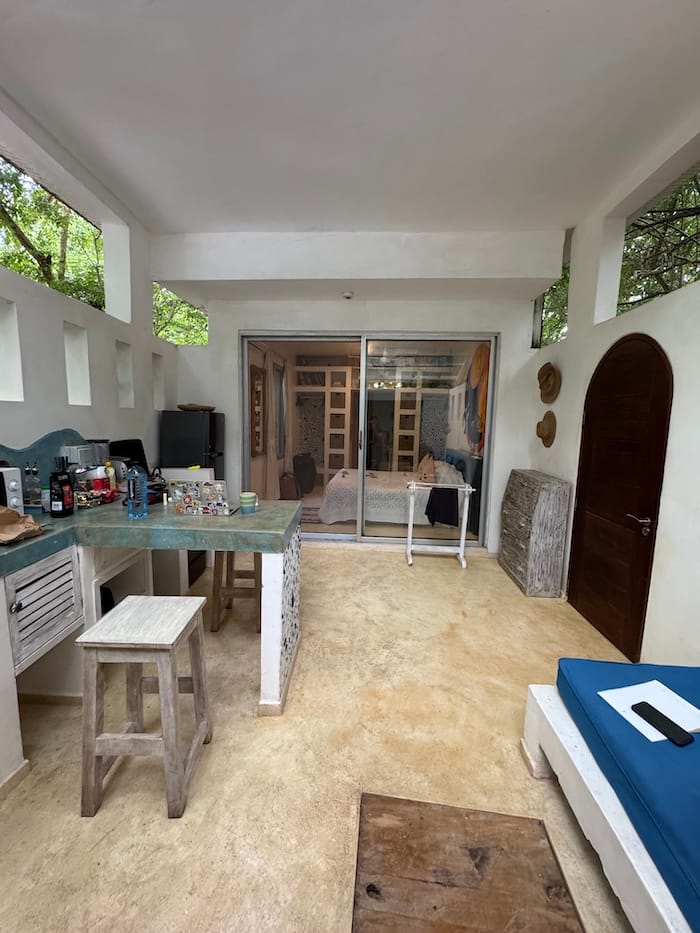
We stayed at Chameleon Backpackers, a long-running hostel and guesthouse close to central Windhoek. It’s also the base for Chameleon Safaris, who we travelled with on our 9-day group tour around Namibia.

Despite being a backpackers, it was surprisingly quiet and relaxed, which made it easy to get some work done or simply have some downtime during the day. At the same time, it was a very social place. There was usually someone around to chat to, and Chameleon regularly organised dinners, quiz nights and other activities. It struck a good balance between having some atmosphere without feeling like a party hostel.

There’s also a shared kitchen, which is particularly useful if you’re staying for more than a couple of nights and don’t want to eat out for every meal.

Chameleon also offers a free walking tour of Windhoek, giving you an easy introduction to the city and its history. If you’re joining one of their Namibia tours, staying here is particularly convenient as everything starts from the same place.

There’s a good range of accommodation available, including dorms, several categories of private rooms, family rooms and even tents, making Chameleon an option for different budgets and travel styles.

Chameloen backpackers hostel Windhoek room

Other areas to stay in Windhoek

Although we enjoyed Chameleon Backpackers, if we returned to Windhoek for a longer stay, particularly while working remotely, we’d probably choose Klein Windhoek.

Another area we’d consider is around The Village. We really liked the atmosphere here, with several restaurants, cafés and places for drinks clustered together.

If you’re only spending a night or two in Windhoek before joining a safari, somewhere central like Chameleon is very convenient.

Things to Do in Windhoek

You don’t need a huge checklist for Windhoek. Most of the central sights are relatively close together and can easily be combined into one day.

Take a Free Walking Tour

If you’re staying at Chameleon Backpackers, their free walking tour is an easy way to get your bearings.

The tour takes you through central Windhoek and introduces some of the city’s main landmarks and history. It’s particularly useful at the beginning of your stay, as you can return to anything you want to explore in more detail afterwards.

Visit Christ Church

Sitting prominently above the city centre, Christ Church, or Christuskirche, is probably Windhoek’s most recognisable building.

The Lutheran church dates back to the German colonial period, and its distinctive architecture makes it stand out immediately from the more modern buildings surrounding it.

It’s also conveniently located close to several of Windhoek’s other main sights, so it’s easy to include while exploring the centre on foot.

Walk Around Parliament Gardens and Tintenpalast

Close to Christ Church you’ll find the Parliament Gardens and Tintenpalast, home to Namibia’s parliament.

The gardens provide a greener contrast to the surrounding streets and are another easy stop while exploring central Windhoek.

Parliament Gardens in Windhoek with Christuskirche in the background
Parliament Gardens
Parliament Gardens in Windhoek
Parliament Gardens
Christuskirche in central Windhoek, Namibia
Christ Church

Explore Windhoek’s Independence Monuments

Around the Independence Memorial Museum you’ll find several monuments connected to Namibia’s colonial history, struggle for independence and those who lost their lives under colonial rule.

It’s worth spending some time walking around this area rather than simply heading straight into the museum.

Namibia has a complex and often brutal history, and learning some of that story in Windhoek gives you important context before travelling further around the country.

Browse the Markets

If you’re looking for Namibian crafts and souvenirs, there are a couple of places worth checking out in central Windhoek.

The Namibia Craft Centre brings together a large number of local crafts under one roof, with everything from jewellery and textiles to carvings, baskets and other handmade products.

We also visited the Craft Market on Independence Avenue, where you’ll find stalls selling souvenirs and crafts in a more traditional outdoor market setting.

Both are easy to include while exploring central Windhoek, particularly if you’re looking to pick up something from Namibia before continuing your trip.

Visit the Independence Memorial Museum

One of the most distinctive buildings on Windhoek’s skyline is the Independence Memorial Museum.

The museum focuses on Namibia’s anti-colonial resistance and struggle for independence, making it one of the more important places to visit if you want to understand the country’s recent history.

The building itself also has an unusual backstory. It was constructed by North Korea’s Mansudae Overseas Projects, which has been responsible for monumental architecture and statues in several African countries.

Independence Memorial Museum in central Windhoek, Namibia

Have Sunset Drinks Above Windhoek

At the top of the Independence Memorial Museum you’ll find a restaurant with panoramic views across Windhoek.

We came here for drinks around sunset, and it’s a great place to see the city from above.

You get a particularly good view across to Christ Church and the surrounding city centre, while the hills around Windhoek stretch out into the distance.

If you only have one day in Windhoek, we’d time your sightseeing so that you end up here towards sunset.

View over Windhoek from the Independence Memorial Museum restaurant
Sunset drinks overlooking central Windhoek and Christuskirche

Where to Eat in Windhoek

We were actually more impressed by Windhoek’s restaurant scene than its list of tourist attractions. There are several areas where restaurants and bars are clustered together, making it easy to head somewhere for the evening and decide where you want to eat once you arrive.

Joe’s Beerhouse

If there’s one restaurant almost everyone seems to know in Windhoek, it’s Joe’s Beerhouse.

The sprawling restaurant is packed with Namibian memorabilia and has an atmosphere that makes dinner feel like part meal, part experience.

One of the big reasons to come here is the opportunity to try different types of game meat. We tried several during our time in Namibia, but the surprise for us at Joe’s was giraffe. We had no idea what to expect, but absolutely loved it.

If you’re curious about trying game meat while travelling in Namibia, Joe’s is an easy place to start.

Entrance to Joe's Beerhouse in Windhoek, Namibia
Joe’s Beerhouse
Game meat served at Joe's Beerhouse in Windhoek
Joe’s Beerhouse
The Village in Windhoek
The Village

The Village

We really liked The Village, a relaxed café and restaurant in Windhoek with a lovely outdoor setting. It’s a good spot for breakfast, lunch, coffee or drinks, and also somewhere you can comfortably sit with a laptop and get some work done.

They occasionally host markets and other events too, and there are several other restaurants and places for drinks within the same complex and nearby.

We came back here several times during our stay and really liked the atmosphere, whether we were stopping for something to eat, getting some work done or heading out in the evening.

The Stellenbosch Wine Bar & Bistro

Another place we enjoyed was The Stellenbosch Wine Bar & Bistro.
It’s a good option if you want something a little more polished, with a strong focus on meat, wine and South African-influenced food.

It’s also in Klein Windhoek, the part of the city we’d probably choose as our base if we returned for a longer stay.

Butcher Block Namibia

Butcher Block Namibia is another good option, particularly if you’re looking for steak and grilled meat.

There are several other restaurants and places for drinks around this area too, so you don’t necessarily need to decide exactly where you’re eating before you arrive.

Using Windhoek as a Base for Exploring Namibia

Windhoek is the starting point for many trips around Namibia, whether you’re joining an organised tour or picking up a rental car and travelling independently.

We chose a 9-day group tour with Chameleon Safaris, travelling from Windhoek through some of Namibia’s most spectacular landscapes before eventually returning to the capital. Travelling as part of a small group meant we didn’t need to worry about driving the huge distances ourselves or organising accommodation and activities along the way.

We’ve written a full guide to the experience, including the route, accommodation, camping and what travelling Namibia with Chameleon was actually like.

READ MORE: HOW TO TRAVEL IN NAMIBIA: OUR 9-DAY ADVENTURE WITH CHAMELEON SAFARIS

If you’d rather travel independently, we’ve also explored Namibia on a self-drive trip. You can read everything we learned about renting a 4×4, driving conditions, fuel, camping and planning your route in our Namibia Self Drive Guide.

Windhoek is also a practical place to return to between different parts of a longer trip.

There are large supermarkets, restaurants, accommodation at different price points and all the everyday services you might need before heading somewhere more remote.

Get 10% Off Chameleon Safaris

If you’re planning to explore Namibia with Chameleon Safaris, they have given LBSB World readers 10% off tours and safaris booked through their website.

Simply use our promo code: PADDINGTON10

The discount can be used when booking directly with Chameleon Safaris.

READ MORE: CHAMELEON SAFARIS PROMO CODE: GET 10% OFF YOUR NAMIBIA TOUR

Getting Around Windhoek

How you get around Windhoek depends quite a lot on where you’re staying and what you’re planning to do. During the day, we felt comfortable walking around the central parts of Windhoek and areas such as Klein Windhoek and around The Village.

For shorter journeys within these areas, walking is perfectly practical. The bigger issue is distance. Windhoek is fairly spread out, and places that don’t look particularly far apart on a map can turn into quite a long walk.

For longer journeys, we used InDrive. You enter your destination and the amount you’re willing to pay, and drivers can then accept the ride. It worked well for us, although we sometimes had to wait a while for a car.

The main tourist sights in central Windhoek are much easier to explore on foot. Christ Church, Parliament Gardens, the Independence Memorial Museum and several of the city’s monuments are all relatively close together.

After dark, we’d generally choose InDrive rather than walking longer distances, particularly when returning from restaurants or bars.

Is Windhoek Good for Digital Nomads?

While we wouldn’t spend a week in Windhoek purely for sightseeing, we found it a surprisingly good place to stop and work for a while.

It has the practical things we need when travelling long-term: good internet, supermarkets, restaurants, cafés and relatively easy transport. There are also enough places to go for dinner or drinks in the evening without the city feeling overwhelmingly busy.

Chameleon Backpackers worked well for us. It was quiet during the day, but still social, with dinners, quiz nights and other activities if we felt like joining in. Having a shared kitchen was another bonus when staying longer.

Windhoek isn’t somewhere we’d travel to specifically as a digital nomad destination, but if you’re already travelling through Namibia and need a comfortable place to stop, work and reset for a week or two, it works very well.

Is Windhoek Safe?

We felt comfortable walking around central Windhoek, Klein Windhoek and The Village during the day.

After dark, we generally used InDrive rather than walking between different parts of the city, particularly when heading back from restaurants or bars.

As elsewhere, we’d recommend being aware of your surroundings, keeping valuables discreet and asking your accommodation for current local advice.

How Many Days Do You Need in Windhoek?

For sightseeing, one or two days is plenty.

One full day gives you time to explore the centre, see Christ Church and the Independence Memorial Museum, browse the markets and finish with sunset drinks overlooking the city.

With two days, you can take things more slowly, join the walking tour and spend more time exploring Windhoek’s restaurants and neighbourhoods.

If you’re using Windhoek as a base, working remotely or simply taking a break during a longer Namibia trip, staying longer makes much more sense.

Is Windhoek Worth Visiting?

We think Windhoek is worth a stop, even if it isn’t the main reason you’re travelling to Namibia.

Give yourself a day or two rather than heading straight from the airport into the rest of the country. Explore the centre, learn a little about Namibia’s history, have a sunset drink overlooking the city and make time for dinner at Joe’s Beerhouse.

For us, though, Windhoek’s appeal went beyond its sights. We enjoyed the restaurants, the slower pace and having somewhere comfortable to stop between travels.

We’d happily come back.

September 1, 2026 0 comments
FacebookTwitterPinterestLinkedinRedditStumbleuponWhatsappTelegramThreadsOpenAIChatGPTEmail
Kibiji Cycling Route
Japan

Kibiji Cycling Route Rentals: A Day Trip from Okayama

by Sam August 26, 2026
written by Sam

The Kibiji Cycling Route was one of the easiest and most enjoyable day trips we did from Okayama. This scenic cycling road runs for around 25km through the Kibi Plain and has even been selected as one of Japan’s “100 Best Roads”, which makes sense once you are riding past rice fields, quiet lanes, working farms, old shrines and a five-storied pagoda rising above the countryside.

We did this as part of our 23 day slow travel route through western Japan, and it was exactly the kind of day we love. No big crowds, no complicated planning, just a local train, a rented bicycle, blue arrows painted on the road, and a slow ride through rural Okayama.

The full Kibiji Cycling Road is around 25km, but the section most travellers ride is the easy point-to-point route between Bizen-Ichinomiya Station and Soja Station. Our ride was about 17km, mostly flat, and simple to follow.

Kibiji District Cycle Path

Kibiji Cycling Route Quick Facts

  • Start: Bizen-Ichinomiya Station
  • Finish: Soja Station
  • Distance: around 17km for the main point-to-point route
  • Difficulty: easy
  • Terrain: mostly flat
  • Bike rental: available near Bizen-Ichinomiya Station
  • Drop-off: possible at Soja Station for an extra fee
  • Best for: slow travellers, countryside views, easy cycling, shrines and rural Japan
  • Time needed: half a day if you keep moving, longer if you stop often

Official route info: Okayama Kibiji Bicycle Path

How to Get to the Kibiji Cycling Route from Okayama

The easiest way to start is by taking the JR Kibi Line from Okayama Station to Bizen-Ichinomiya Station.

Google Maps: Bizen-Ichinomiya Station

Once you arrive, the bike rental shop is close to the station, so you do not need to cycle through Okayama city traffic. This is one of the reasons the route works so well as an easy day trip.

We would definitely recommend starting at Bizen-Ichinomiya and cycling towards Soja. It felt simple to follow in this direction, and the blue Kibiji District arrows on the road made navigation easy.

Renting Bikes at Uedo Rent-a-Cycle

We rented bikes from Uedo Rent-a-Cycle, close to Bizen-Ichinomiya Station.

Google Maps: Uedo Rent-a-Cycle

When we visited, bike rental was ¥1,500 each. We chose the one-way drop-off option, which meant we could return the bikes at Araki Rent-a-Cycle near Soja Station for an extra ¥500 each., so it is worth carrying yen rather than relying on card payment.

It was cash only when we visited, but there was a 7-Eleven nearby if you need an ATM. We were also given a paper map, which was useful even though the route was easy to follow.

Dropping the Bikes Off at Soja Station

At the end of the ride, we dropped the bikes off at Araki Rent-a-Cycle near Soja Station.

Google Maps: Araki Rent-a-Cycle, Soja

Araki Rent-a-Cycle is listed as being around a 1-minute walk from JR Soja Station, which makes the end of the route very easy. Once you return the bikes, you can simply take the train onwards or head back towards Okayama.

Araki Rent-a-Cycle official site: Araki Rent-a-Cycle

Following the Blue Kibiji District Arrows

One of the best things about this route is how easy it is to navigate.

The road has blue Kibiji District cycling arrows painted onto the surface, pointing you in the right direction. These were really useful and made the ride feel relaxed rather than stressful.

You still want Google Maps as a backup, but most of the time we just followed the arrows, checked the map occasionally, and enjoyed the ride.

Blue Kibiji District cycling route arrow painted on the road in Okayama
Blue Kibiji District arrows mark the cycling route between Bizen-Ichinomiya and Soja.

What the Kibiji Cycling Route Is Like

This is not a dramatic mountain ride or a serious cycling challenge. It is the opposite, really, and that is the beauty of it.

The route is mostly flat, gentle and easy. You pass rice fields, small roads, irrigation channels, houses, farms and quiet rural scenery. When we visited in mid October, farmers were harvesting in the fields, the weather was still warm but not too hot, and the whole ride had that lovely slow autumn feeling.

It was one of those Japan days that felt simple in the best possible way. No rushing, no huge sights every five minutes, just a peaceful ride through the countryside with a few genuinely worthwhile stops along the way.

What to Visit on the Kibiji Cycling Route

Kibitsu Jinja

Kibitsu Jinja is one of the main sights in the area and is absolutely worth visiting either before or during your cycling day.

Google Maps: Kibitsu Jinja

The shrine is best known for its long wooden corridor, which stretches through the grounds and gives the whole place a peaceful, slightly hidden feeling. There are also smaller shrines and quiet corners around the site, so give yourself time to wander.

We actually visited Kibitsu Jinja on foot the day before our bike ride, taking the train from Okayama Station to Kibitsu Station and walking around 10 minutes to the shrine. That worked well for us because it meant we could take our time without folding it into the cycling day.

Kibitsu Jinja (Sanbi Ichinomiya) Entrance
Kibitsujinjakairo Corridor
Okamaden at Kibitsu Jinja

Five-Storied Pagoda of Bitchu Kokubun-ji Temple

The Five-Storied Pagoda of Bitchu Kokubun-ji Temple is probably the most scenic stop on the route.

Google Maps: Five-Storied Pagoda of Bitchu Kokubun-ji Temple

You can see the pagoda from a distance as you cycle through the countryside, which makes arriving there feel even better. It stands beautifully above the surrounding fields and is one of the moments where the route really feels special.

This was our favourite kind of Japan sightseeing: quiet, open, easy to enjoy, and not overwhelmed by tour groups.

Five-storied Pagoda of Bitchu Kokubun-ji Temple

Suggested Morning Itinerary

If you want to keep this as an easy half-day trip from Okayama, this is how I would structure it:

  1. Take the JR Kibi Line from Okayama Station to Bizen-Ichinomiya Station.
  2. Pick up bikes from Uedo Rent-a-Cycle.
  3. Follow the blue Kibiji District arrows towards Soja.
  4. Stop at Kibitsu Jinja and walk through its famous long wooden corridor.
  5. Continue through the rice fields, quiet lanes and countryside viewpoints.
  6. Visit the Five-Storied Pagoda of Bitchu Kokubun-ji Temple.
  7. Continue towards Soja.
  8. Drop the bikes at Araki Rent-a-Cycle near Soja Station.
  9. Take the train back, or continue to Kurashiki for the afternoon.

If you are staying in Okayama, this works really well in the morning. Start early, enjoy the cooler part of the day, and leave your afternoon free.

Add Kurashiki Afterwards

If you still have energy after the ride, Kurashiki makes a very easy afternoon add-on.

After dropping the bikes at Soja Station, you can take the train towards Kurashiki and spend the afternoon around the canal area. We’d suggest keeping it relaxed: have ramen, wander the old streets, look at the denim shops, and sit by the river with a coffee.

It makes a lovely full day from Okayama: rural cycling in the morning, Kurashiki’s historic canal area in the afternoon.

For ramen, we liked Shodoshima Ramen Hishio in Kurashiki.

Kurashiki River
Chilling at Kurashiki River
Kurashiki at sunset
Kurashiki at sunset

What to Bring

You do not need much, but bring the basics:

  • Cash for bike rental and drop-off fee
  • IC card or train ticket
  • Water
  • Sunscreen or a hat
  • Comfortable clothes
  • Phone with Google Maps
  • Portable charger
  • Small bag or backpack
  • Camera

If you visit in summer, start early. The route is flat, but there is not always shade, and cycling through open fields in the heat would be much less fun.

Is the Kibiji Cycling Route Difficult?

No, not really.

The route is mostly flat and very beginner-friendly. You do not need to be a serious cyclist, and you do not need a fancy bike. The distance is long enough to feel like a proper day out, but short enough that it never becomes intimidating.

The only thing to watch is time. If you stop often for photos, shrines, snacks and countryside views, it will naturally take longer than the distance suggests. But that is also the point.

How Long Do You Need?

If you keep moving and only make short stops, you could cycle the main route in a morning.

For a more relaxed version, allow half a day. That gives you time to pick up the bikes, follow the route slowly, stop at Kibitsu Jinja, visit the pagoda, take photos, and return the bikes without feeling rushed.

If you want to continue to Kurashiki afterwards for lunch, ramen, coffee or shopping, start early so the cycling route does not eat into too much of your afternoon.

Where We Stayed in Okayama

We stayed at Hotel LiVEMAX Okayama West, which worked well for this day trip because it was close to Okayama Station. That made the morning simple: we could walk to the station, take the JR Kibi Line to Bizen-Ichinomiya, pick up the bikes and start the route without any extra transport faff.

It’s a regular business hotel, but for this part of the trip the location was the main thing. If you are planning to cycle the Kibiji Route or use Okayama as a base for day trips, staying near the station makes everything much easier.

Final Thoughts on Cycling the Kibiji Route

Cycling the Kibiji route was one of our favourite slow travel days in Okayama. It was easy to organise, easy to navigate, and gave us a beautiful glimpse of rural Japan without needing a car.

The blue arrows made the route simple to follow, the countryside was peaceful, and visiting in mid October meant rice fields, harvest scenes and comfortable cycling weather. It was not flashy or famous in the way some Japan sights are, but that is exactly why we enjoyed it.

If you are staying in Okayama and want a relaxed day trip that feels completely different from the city, the Kibiji Cycling Route is well worth adding to your itinerary.

This ride was part of our wider 23 day slow travel route through western Japan. You can read the full journey here: 23 Day Japan Slow Travel Itinerary by Train

August 26, 2026 0 comments
FacebookTwitterPinterestLinkedinRedditStumbleuponWhatsappTelegramThreadsOpenAIChatGPTEmail
Kibitsu Jinja (Sanbi Ichinomiya) Entrance
Japan

Okayama Travel Guide: A Practical Base for Kurashiki and the Kibi Plain

by Sam August 25, 2026
written by Sam

Okayama was the final longer stop on our 23 day slow travel route through western Japan. We stayed for 4 nights, although unless you want a slower base with a couple of day trips, you could probably stay for less.

For us, Okayama worked best as a practical stop rather than a city we fell madly in love with. It has good train connections, easy access to Kurashiki, and one of the nicest low-effort cycling routes we did in Japan: the Kibi Plain route between Bizen-Ichinomiya and Soja.

It was a useful place to pause, eat ramen, rent bikes, visit shrines, and take a relaxed day trip to Kurashiki before finishing our 23 Day Japan Slow Travel Itinerary by Train.

The Hello Kitty local train at Okayama Station
Kibitsu Jinja
Kibitsu Jinja
Kibiji District Cycle Path

Where We Stayed in Okayama

We stayed at Hotel LiVEMAX Okayama West.

The location was convenient for Okayama Station, which mattered more than anything else for us. By this point in the trip, we were using Okayama as a base for day trips, so being close to trains made life easy.

We stayed 4 nights, but if you are only planning to visit Kurashiki and do the Kibi Plain cycling route, 2 or 3 nights would probably be enough.

Why Visit Okayama?

Okayama is not the most exciting city we visited in Japan, but it is a very useful base. It sits in a great location for exploring nearby places by train, especially if you are travelling slowly through western Japan.

The highlights for us were:

  • Cycling the Kibi Plain
  • Visiting Kibitsu Jinja Shrine
  • Taking a day trip to Kurashiki
  • Eating very large bowls of ramen
  • Having a few slower days after moving regularly along the Sanin Line

If you are following a wider Japan itinerary, Okayama works well as a practical stop between the Sanin coast and onward travel towards bigger cities.

Things to Do in Okayama

Cycle the Kibi Plain

The best thing we did from Okayama was rent bikes and cycle part of the Kibi Plain route.

We took the train from Okayama Station to Bizen-Ichinomiya Station, then rented bikes from Uedo Rent-a-Cycle.

The rental cost was ¥1,500 each, with the option to drop the bikes off at Soja Station for an extra ¥500 each. It was cash only when we visited, but there was a 7-Eleven nearby if you need an ATM.

The route is flat, easy, and very relaxed. You cycle through rice fields, quiet countryside and small villages, with shrine and temple stops along the way. It is not a difficult ride at all, and it made a lovely contrast to the towns and cities we had been visiting.

This is the short version here, because the Kibi Plain cycling route deserves its own proper post.

Official tourism information lists the Kibi cycling route as running between Bizen-Ichinomiya and Soja, with bike rental available at both ends and one-way drop-off possible for an additional fee. You can check current details on the Okayama tourism Kibi Cycling Route page.

Kibiji District Cycle Path

Visit Kibitsu Jinja

Kibitsu Jinja was one of the best places we visited around Okayama. We went there on foot the day before our bike ride, taking the train from Okayama Station to Kibitsu Station, then walking around 10 minutes to the shrine.

The shrine is best known for its long wooden corridor, which stretches beautifully through the grounds and makes the whole place feel much larger than a quick map glance suggests. There are also lots of smaller shrines and quiet corners around the site, so it is worth taking your time rather than treating it as a quick photo stop.

The area around Kibitsu Jinja is peaceful and easy to explore slowly, but the shrine grounds are bigger than they first appear, so give yourself enough time to wander without rushing.

Kibitsujinjakairo Corridor
Okamaden at Kibitsu Jinja

See the Five-Storied Pagoda at Bitchu Kokubun-ji Temple

One of the most beautiful sights on the Kibi Plain route is the Five-Storied Pagoda of Bitchu Kokubun-ji Temple.

Cycling towards it through the countryside is part of the appeal. The route is mostly flat, with open views, rice fields and a slower rural feel that makes this one of the easiest and most enjoyable half-day trips from Okayama.

Five-storied Pagoda of Bitchu Kokubun-ji Temple

Day Trip to Kurashiki

Kurashiki is an easy day trip from Okayama by train, and it was well worth doing.

The main tourist area is the Kurashiki Bikan Historical Quarter, centred around the old canal. You can take a short boat ride along the water, but it is also lovely just to buy a coffee, sit by the river, and enjoy the old buildings.

Kurashiki is more polished and more touristy than some of the smaller places we visited earlier in the trip, but it is still very pretty.

Denim Shopping in Kurashiki

Kurashiki is also known for denim, and there are plenty of shops if you are interested in Japanese jeans or denim clothing.

We found cheaper denim clothes at Kurara Kurashiki Denim. If you want something more stylish and trendier, Kurashiki Denim Street is the more obvious stop, although prices are higher.

SNOOPY Chocolat

If you are into Snoopy like Livia, there is also a SNOOPY Chocolat shop selling Kurashiki-only style souvenirs and chocolates.

Is it essential? No. Is it very Japan? Absolutely.

Boat trips at Kurashiki River
Snoopy Chocolat shop in Kurashiki
Kurashiki at sunset
Kurashiki at sunset
Kurashiki River at sunset

Where to Eat in Okayama

Chuka Soba Fujiya

We ate a massive bowl of ramen at Chuka Soba Fujiya Granvia Branch, close to Okayama Station.

It was exactly what we needed: easy, filling, close to transport, and very satisfying after a travel day.

Chuka Soba Asazuki Honten

We also ate another huge bowl of ramen at Chuka Soba Asazuki Honten, a long-running ramen shop in Okayama.

This was exactly the kind of place we love finding in Japan: simple, filling, local, and very satisfying after a day of walking or cycling. If you are staying near Okayama Station and want another easy ramen option, this is a good one to add to your list.

Izakaya Yotteba

We also went to Izakaya Yotteba, which was another easy local food option while staying near the station area. The seating area is raised and the chairs are sunken. Great vibes and friendly staff.

Shodoshima Ramen Hishio in Kurashiki

During our Kurashiki day trip, we ate at Shodoshima Ramen Hishio. It’s on the corner and you’ll spot the denim stools at the bar.

If you are already spending the day around the canal area, it is a great place to keep in mind.

Shodoshima Ramen Hishio in Kurashiki
Izakaya Yotteba in Okayama

How Many Days Do You Need in Okayama?

1 Day

One day is enough if you only want to pass through Okayama and maybe visit Kurashiki or one nearby sight.

2 Days

Two days gives you enough time for one day trip to Kurashiki and one day around Okayama or the Kibi Plain.

3 Days

Three days is probably the sweet spot if you want to cycle the Kibi Plain, visit Kurashiki, and not feel rushed.

4 Days

We stayed 4 nights, which worked for our slow travel pace, but it is more than most people will need unless you want downtime or are using Okayama as a very relaxed base.

Final Thoughts on Okayama

Okayama was not the most memorable city on our Japan route, but it was one of the most useful. It gave us easy transport, good day trips, and a chance to slow down before finishing our journey.

The Kibi Plain cycling route was the real highlight for us, followed by Kurashiki as an easy and pretty day trip. If you are travelling through western Japan by train, Okayama makes sense as a base, just do not expect the city itself to do all the heavy lifting.

This stop was part of our wider slow travel route through western Japan. You can read the full journey here: 23 Day Japan Slow Travel Itinerary by Train

August 25, 2026 0 comments
FacebookTwitterPinterestLinkedinRedditStumbleuponWhatsappTelegramThreadsOpenAIChatGPTEmail
Livia on the Tottori Sand Dunes
Japan

Is Tottori Worth Visiting on a Japan Trip?

by Sam August 25, 2026
written by Sam

Tottori was one of the more unusual stops on our 23 day slow travel route through western Japan. After a few quieter places along the Sanin Line, it was also the first time in weeks that we noticed more tourists around again.

We stayed for 2 nights, which gave us enough time to see the famous Tottori Sand Dunes, visit the Sand Museum, eat well near the station, and enjoy a slower stop before continuing our journey.

Tottori is not a city packed with endless sights, but it does have one very clear reason to visit: the dunes. Huge sand dunes rolling down towards the sea are not something you expect to find in Japan, and that alone makes Tottori feel different from anywhere else we visited.

Tottori Dunes
Tottori Dunes

Where We Stayed in Tottori

We stayed at Tottori Washington Hotel Plaza.

The location was the main reason we chose it. It is close to Tottori Station, which made arriving by train, catching buses, and leaving again very easy. For a short 2-night stop, being near the station worked perfectly.

Tottori - just another Japanese City
Tottori – just another Japanese City
Japanese Business Hotel Pajamas

Why Visit Tottori?

The main reason to visit Tottori is the sand dunes. They are the largest sand dunes in Japan, and they sit right beside the Sea of Japan, which makes the landscape feel surprisingly dramatic.

But the dunes are not the only reason to go. The Sand Museum is genuinely impressive, especially if you visit before walking out to the dunes themselves. We also found Tottori easy to use as a short, practical stop on our slow train route through western Japan.

It felt busier than some of the smaller towns we had visited before it, but still calm compared with Japan’s major tourist cities.

Things to Do in Tottori

Visit the Tottori Sand Museum

The Tottori Sand Museum was much better than we expected. It is an indoor museum filled with huge sand sculptures, and the detail is seriously impressive.

When we visited, the exhibition theme was Japan, which felt like a perfect fit for the trip. The theme changes regularly, so it is worth checking what is on before you go. The official Sand Museum website says the museum usually runs one main exhibition theme each year, with the display open from spring until early January before closing for the next exhibition changeover.

Adult entry is currently listed as ¥800, with student tickets at ¥400, according to the official Sand Museum information page.

Tottori Sand Museum
Tottori Sand Museum
Tottori Sand Museum
Tottori Sand Museum
Tottori Sand Museum
Tottori Sand Museum
Tottori Sand Museum
Tottori Sand Museum

Walk Across the Tottori Sand Dunes

After the museum, cross the road and walk over to the Tottori Sand Dunes.

The dunes are, well, sand dunes — but sand dunes that roll all the way down towards the sea, which is what makes them special. It is a strange and slightly surreal landscape, especially in Japan, where so much of our route had been towns, mountains, rivers and old streets.

You can walk up and across the dunes, then down towards the beach if you want to. Just remember that sand is much harder work than it looks, especially if the weather is hot.

We would recommend going early. By late morning, the dunes were already getting busier, so the early bus is worth it.

Livia & Sam on the Tottori Sand Dunes
Livia on the Tottori Sand Dunes

Stop at the Sakyu Center

We got off the bus at Sakyu Center, which is near the chairlift/cable car area above the dunes.

From there, you can walk down towards the Sand Museum first, then continue to the dunes afterwards. This worked well because it meant we visited the museum before the dunes got too busy.

Just make sure you check return bus times before wandering too far. Buses are not constant, and you do not want to finish at the dunes only to realise you have a long wait.

Try the Pear Shake at Tottori Station Starbucks

Tottori is famous for pears, and we somehow ended up at Starbucks at the station drinking a pear shake. Was it the most local, hidden, off-the-beaten-path experience in Japan? Absolutely not. Was it delicious? Yes.

If the pear shake is available when you visit, it is worth trying.

Google Maps: Starbucks Tottori Station

Where to Eat in Tottori

GyuTonBaKei Yakiniku

Our favourite food stop in Tottori was GyuTonBaKei Yakiniku.

It was a great local food joint: friendly, relaxed, and exactly the kind of place we love finding while travelling. The staff were super welcoming, and the food was excellent.

After a day out at the dunes, it made for a very good evening meal.

Pear shake at Tottori Starbucks
We all love Yakiniku

How to Get to Tottori Sand Dunes by Bus

The easiest way to reach the dunes without a car is by bus from Tottori Station.

When we visited, we took bus 39 from Tottori Station towards the dunes. The fare was ¥380, and the journey took around 30 minutes. We got off at Sakyu Center, which is useful if you want to start near the chairlift area and walk down towards the Sand Museum.

Official tourism information also lists buses from Tottori Station to the Sand Museum / dune area, with journey times around 20–30 minutes depending on the service. There is also a Loop Kirinjishi Bus on weekends and holidays, according to the official Tottori tourism site.

The important thing is this: there are not loads of buses.

Check your outbound and return times carefully before you go. We would suggest taking an early bus, visiting the Sand Museum first, then walking across to the dunes. Before you head too far into the sand, check what time you need to be back for the return bus.

Suggested Half-Day Route to the Dunes

This is the route we would suggest:

  1. Take an early bus from Tottori Station.
  2. Get off at Sakyu Center.
  3. Walk down to the Sand Museum.
  4. Visit the Sand Museum before it gets too busy.
  5. Exit near the lower/main entrance.
  6. Cross the road to the Tottori Sand Dunes.
  7. Walk across the dunes towards the sea.
  8. Return in time for your chosen bus back to Tottori Station.

This works well as a morning trip and leaves the afternoon free for food, coffee, or a slower wander around the station area.

How Many Days Do You Need in Tottori?

1 Day

One full day is enough if you only want to visit the Sand Museum and Tottori Sand Dunes. Arrive the night before or early in the morning, visit the dunes, then continue onwards.

2 Days

Two nights worked well for us. It gave us enough time to arrive without rushing, visit the dunes properly, eat locally, and continue our slow train route without making Tottori feel like a dash.

3+ Days

If you have more time, you could use Tottori as a base for exploring more of the coast, nearby temples, or other parts of eastern Tottori Prefecture. For our itinerary, though, 2 nights was enough.

Practical Tips for Visiting Tottori Sand Dunes

Go early if you can. The dunes can get busy by late morning.

Check bus times carefully. Services are not constant, and return timing matters.

Visit the Sand Museum before the dunes. It is indoors, structured, and easier to enjoy before you get sandy and tired.

Wear comfortable shoes. Sand is harder to walk on than it looks.

Bring water. There are facilities around the dune area, but once you are out walking, it is exposed.

Check the Sand Museum exhibition before visiting. The theme changes, and the museum closes between exhibition periods.

Be ready for wind. It is an open coastal sand area, so weather can make a big difference.

Final Thoughts on Tottori

Tottori was a worthwhile 2-night stop on our slow train route through western Japan. The city itself did not grab us in the same way as Matsue or Kurayoshi, but the dunes and Sand Museum made it memorable.

It is the kind of place that works best as part of a wider Sanin Line journey rather than a standalone city break. If you are travelling slowly through western Japan, Tottori gives you something completely different: sand, sea, sculpture, and a landscape you probably do not expect to find in Japan.

This stop was part of our wider route across western Japan. You can read the full journey here: 23 Day Japan Slow Travel Itinerary by Train

August 25, 2026 0 comments
FacebookTwitterPinterestLinkedinRedditStumbleuponWhatsappTelegramThreadsOpenAIChatGPTEmail
Looking out over Lake Toba from Samosir Island in North Sumatra
Indonesia

Lake Toba & Samosir Island: Is It Worth Visiting?

by Livia August 22, 2026
written by Livia

Lake Toba was probably the place we connected with least during our time in North Sumatra.

That’s not to say it isn’t beautiful. It absolutely is. The enormous volcanic lake, green hills and traditional Batak villages make this one of the most distinctive landscapes in Indonesia. But after spending five nights on Samosir Island we came away with mixed feelings.

For some reason, the atmosphere just felt a little off to us. We also found people noticeably less friendly than elsewhere we’d travelled in Indonesia, where we’d become so used to incredibly warm and welcoming interactions.

We’re still glad we visited, though. Lake Toba gave us a completely different experience from Bukit Lawang and Berastagi and introduced us to the culture and traditions of the Batak people.

Traditional Batak houses at Huta Siallagan on Samosir Island
Exploring the countryside on Samosir Island
Mountain scenery surrounding Lake Toba in North Sumatra

Getting to Lake Toba from Berastagi

After hiking Mount Sibayak in Berastagi, our next stop was Lake Toba.

We travelled by road from Berastagi to Parapat, the main gateway for reaching Samosir Island. From there, we took the ferry across Lake Toba to Samosir.

The ferry journey is a lovely introduction to the lake. Once you leave Parapat behind, you begin to appreciate just how enormous Lake Toba actually is, with mountains and green hills surrounding the water in almost every direction.

Most travellers staying on Samosir head to Tuk Tuk, where you’ll find plenty of guesthouses, restaurants and accommodation along the lakeshore.

Ferry from Parapat to Samosir Island on Lake Toba
Crossing Lake Toba by ferry to Samosir Island

Where We Stayed on Samosir Island

We stayed at Tabo Cottages in Tuk Tuk for five nights.

It’s a well-established place with gardens, a pool and a lovely setting beside Lake Toba. There are different accommodation options spread around the property, and it’s an easy base for exploring this part of Samosir.

There’s also a strong German influence, including plenty of German food on the menu, which wasn’t necessarily what we expected to find in the middle of Sumatra!

The location worked well for us because we could spend quieter days around Tuk Tuk and explore parts of the island on foot, while also arranging a tour to see some of the places further into Samosir.

Tabo Cottages beside Lake Toba on Samosir Island
room at Tabo Cottages beside Lake Toba on Samosir Island

Exploring Samosir Island

We spent one day taking a tour further into Samosir and up into the hills.

Getting away from the lakeshore gives you a completely different perspective on the island. The roads climb above Lake Toba, opening up views across the water, surrounding mountains and villages below.

The scenery was probably what we enjoyed most about our time here. Lake Toba is beautiful from the water, but seeing it from higher up really gives you a sense of the scale of the lake and the volcanic landscape surrounding it.

If you’re staying around Tuk Tuk, we’d recommend spending at least one day exploring beyond the immediate area rather than staying beside the lake for your entire visit.

View across the volcanic landscape of Lake Toba
Traditional Batak architecture on Samosir Island

Walk from Tuk Tuk to Huta Siallagan

Another day, we explored independently on foot.

From Tuk Tuk, we walked towards Ambarita and Huta Siallagan, a traditional Batak village and one of the better-known cultural sites on Samosir Island.

The village is known for its traditional Batak houses and ancient stone chairs, which were historically used for meetings and judicial proceedings by local rulers.

The walk itself was part of the experience. Rather than simply travelling directly to the site, we could see more of everyday life on Samosir along the way.

We also passed some of the distinctive Batak tombs and graves found around the island. Batak burial traditions are very visible on Samosir, with elaborate tombs appearing beside roads and around villages. Some are surprisingly large and ornate, while others are older and rather eerie.

After exploring Huta Siallagan, we didn’t particularly fancy walking the whole way back, so we hailed one of the local motorbike taxis for the return journey to Tuk Tuk.

Traditional Batak architecture on Samosir Island
Historic Batak village of Huta Siallagan on Samosir Island
Exploring the countryside on Samosir Island
Traditional Batak graves near Lake Toba
Batak burial site beside the road on Samosir Island

Batak Culture on Samosir Island

One of the most interesting aspects of visiting Lake Toba is learning a little about Batak culture.

Traditional Batak architecture is immediately recognisable, particularly the houses with their dramatic curved roofs. Around Samosir, you’ll see both preserved traditional villages and Batak architectural influences incorporated into newer buildings.

Huta Siallagan gives some historical context to what you’re seeing elsewhere around the island, while the tombs, villages and traditional houses make Batak culture a visible part of travelling around Samosir rather than something confined to a museum.

This was quite different from the other places we’d visited in Indonesia and was one of the reasons we were glad we’d included Lake Toba in our North Sumatra route.

Traditional Batak houses on Samosir Island
Tabo Cottages beside Lake Toba on Samosir Island

How Long Do You Need at Lake Toba?

We stayed for five nights, which gave us plenty of time.

That allowed us to spend a day touring further around Samosir, walk to Huta Siallagan and still have time to simply enjoy the lake and our accommodation.

For most travellers, we’d say 2-3 nights would probably be enough to get a good introduction to Samosir Island without rushing.

If you want to explore much more of the island, spend time hiking or simply want somewhere to stay for a while beside the lake, you could easily stay longer.

For us personally, five nights was enough.

Getting from Lake Toba to Medan

Our departure from Samosir was unfortunately not quite as straightforward as our arrival.

We’d arranged a shared taxi back to Medan and arrived at the departure point around 30 minutes early, only to be told that our taxi had already left.

When we questioned what had happened, the man we were dealing with became extremely rude and started shouting at us. It was completely unlike the interactions we’d had almost everywhere else during our many travels in Indonesia.

Eventually another man came and helped us and we made our way onwards in another shared taxi, but it wasn’t a particularly pleasant way to finish our time at Lake Toba.

If you’re arranging a shared transfer back to Medan, we’d make sure you confirm the departure arrangements and pick-up point beforehand. If you have a flight to catch, we’d also leave yourself plenty of extra time rather than relying on a tight connection.

Our Mixed Feelings About Lake Toba

It’s difficult to explain exactly why you connect with some places and not others.

There wasn’t one particular incident that shaped our opinion of Lake Toba. Even before the unpleasant experience when we left, we simply hadn’t felt as comfortable here as we had elsewhere in Indonesia.

We found interactions generally less warm than we’d experienced in other parts of the country, and the atmosphere never quite clicked with us.

That’s obviously a very subjective experience. Another traveller could arrive the following week, meet completely different people and come away feeling entirely differently.

And none of that changes the fact that Lake Toba itself is spectacular.

The scenery, Batak villages, traditional architecture and enormous volcanic lake make it a fascinating place to see while travelling through North Sumatra.

Is Lake Toba Worth Visiting?

Despite our mixed experience, we’re glad we went.

Lake Toba is unlike anywhere else we visited during our time in Indonesia, and Samosir Island offers an opportunity to experience Batak culture alongside some genuinely beautiful scenery.

But we also wouldn’t pretend we loved somewhere simply because it’s a popular destination.

Of the main stops on our North Sumatra route, Bukit Lawang was somewhere we could happily have stayed longer, while Lake Toba was somewhere we were ready to leave.

That doesn’t mean we’d tell other travellers to skip it. Lake Toba is absolutely worth seeing and you may have a completely different experience from us.

For our trip, though, three or four nights would probably have been enough.

August 22, 2026 0 comments
FacebookTwitterPinterestLinkedinRedditStumbleuponWhatsappTelegramThreadsOpenAIChatGPTEmail
Hiker at the Mount Sibayak crater near Berastagi, North Sumatra
Indonesia

Mount Sibayak Sunrise Hike: Our Experience in Berastagi, Sumatra

by Livia August 22, 2026
written by Livia

On our Northern Sumatra trip we spent one night in Berastagi, and there was one main reason for stopping here: to climb Mount Sibayak for sunrise.

After several days relaxing in Bukit Lawang, we travelled by taxi through the mountains to Berastagi. The drive itself was beautiful, taking us through the green landscapes of northern Sumatra before reaching the town.

The following morning, we were up long before sunrise and heading towards Mount Sibayak, an active volcano just outside Berastagi.

Getting from Bukit Lawang to Berastagi

We travelled directly from Bukit Lawang to Berastagi by taxi, which was an easy way to make the journey between the two.

It’s also a very scenic drive. As you head towards Berastagi, the landscape becomes increasingly mountainous, with plenty of views along the way.

If you’re travelling through northern Sumatra, combining Bukit Lawang and Berastagi works particularly well. We went from orangutan trekking and rainforest in Bukit Lawang to climbing a volcano in Berastagi, despite the two being relatively close to each other.

North Sumatra volcano views

Where We Stayed in Berastagi

We stayed at Nachelle Homestay for our one night in Berastagi and found the owners incredibly sweet and welcoming.

They also offer Mount Sibayak trekking, which made everything very easy. We joined a small group of 3 from the homestay and went with the husband of the family as our guide rather than arranging a separate tour in advance.

With such an early start, being able to organise everything directly where we were staying was particularly convenient. We could simply get up, meet the group and head out together.

Room at Nachelle Homestay in Berastagi

Where to Eat Near Nachelle Homestay

Another advantage of staying at Nachelle Homestay was having plenty of good local food right outside the door.

There are several bakso warungs nearby, where you can try the Indonesian meatball soup you’ll see all over the country. We also ate at Cafe J.Vayona, just a short walk from the homestay.

We were only in Berastagi for one night, so we didn’t explore the wider restaurant scene, but we certainly didn’t need to travel far to find somewhere good to eat.

Cafe J.Vayona near Nachelle Homestay in Berastagi with resident cat
Local food stalls near Nachelle Homestay in Berastagi

Hiking Mount Sibayak for Sunrise

Our hike started well before sunrise while it was still completely dark outside and we reached the top at around 6:15 am, as the morning light was beginning to appear over the surrounding landscape.

We didn’t find the Mount Sibayak hike particularly difficult. There is some climbing involved, but compared with some of the other hikes we’ve done, it was relatively manageable.

Having a guide also meant we didn’t need to think about navigating the trail in the dark. We could simply follow the group and concentrate on the walk.

Trail leading up Mount Sibayak near Berastagi
Volcanic landscape on the Mount Sibayak hiking trail

Sunrise at Mount Sibayak

Once we reached the top, the landscape opened up around us.

Mount Sibayak is an active volcano, and the crater gives the summit a completely different feel from a normal mountain viewpoint. Steam and volcanic gases rise from parts of the crater, surrounded by rugged volcanic rock and mountains in the distance.

It was also noticeably colder at the top than we’d been used to in Sumatra. We wore our thin puffer jackets and were glad we’d brought them, particularly while standing around waiting for the sun to come up.

Watching the landscape slowly appear as the morning light came in was worth the early start.

Even without the sunrise, the volcanic landscape around the crater makes the hike interesting in its own right.

Looking into the steaming Mount Sibayak crater in North Sumatra
Sunrise view from Mount Sibayak near Berastagi
Hikers at the Mount Sibayak crater near Berastagi, North Sumatra

Visit the Sulfur Hot Springs After the Hike

The morning wasn’t quite finished once we’d climbed back down.

On our way back to Berastagi, we stopped at the sulfur hot springs near Mount Sibayak.

After getting up in the middle of the night and hiking up and down a volcano, sitting in the warm water was a very welcome way to finish the morning.

The pools are naturally heated by the geothermal activity around Mount Sibayak, with views of the surrounding volcanic landscape.

If your Mount Sibayak tour includes the hot springs, bring swimwear with you. We’d definitely recommend adding them rather than heading straight back to Berastagi after the hike.

Sulfur hot springs near Mount Sibayak in Berastagi
Natural hot spring pools near Mount Sibayak

Do You Need a Guide to Hike Mount Sibayak?

We hiked Mount Sibayak with a guide arranged through Nachelle Homestay, and for a sunrise hike we’d happily do the same again.

Starting in complete darkness makes navigating an unfamiliar trail more difficult, and having someone who knew the route meant we didn’t have to worry about finding our way.

It also made the whole experience incredibly easy to arrange. We didn’t book a separate Mount Sibayak tour before arriving in Berastagi. We organised the hike through our accommodation and joined a group from there.

If you’re staying elsewhere in Berastagi, it’s worth asking your accommodation whether they can arrange a Mount Sibayak sunrise hike.

What to Bring for a Mount Sibayak Sunrise Hike

You don’t need huge amounts of equipment for the hike, but there are a few things we’d recommend bringing:

  • Comfortable shoes with decent grip
  • A light jacket or thin puffer jacket
  • Water
  • A headtorch or torch
  • Swimwear if you’re visiting the sulfur hot springs afterwards
  • A small towel
  • Camera or phone

Don’t assume that because you’re in Sumatra it will be hot. Berastagi sits at a higher elevation, and before sunrise on Mount Sibayak it can feel surprisingly cool.

How Long Do You Need in Berastagi?

We only stayed for one night, which was enough for what we’d come to Berastagi to do.

We arrived from Bukit Lawang, stayed at Nachelle Homestay, explored a little around the area and got up early the following morning to hike Mount Sibayak. After the hike and a stop at the sulfur hot springs, we continued our journey.

There are other things to see around Berastagi if you want to stay longer, but we didn’t visit them, so we can’t tell you whether they’re worth adding.

If Mount Sibayak is your main reason for visiting, an overnight stop can work well.

Berastagi church
sunrise view from Mount Sibayak near Berastagi

Is the Mount Sibayak Sunrise Hike Worth It?

For us, yes.

We didn’t spend enough time in Berastagi to write a complete guide to the town, but stopping here for one night worked perfectly as part of our journey through northern Sumatra.

The hike wasn’t particularly difficult, the volcanic landscape around the crater was beautiful, and soaking in the sulfur hot springs afterwards was a great way to finish the morning.

After the rainforest and orangutans of Bukit Lawang, spending a night in the mountains and starting the next morning on top of an active volcano gave us a completely different side of northern Sumatra.

If you’re travelling through the region, Mount Sibayak is well worth adding to your route, even if, like us, you only have one night in Berastagi.

August 22, 2026 0 comments
FacebookTwitterPinterestLinkedinRedditStumbleuponWhatsappTelegramThreadsOpenAIChatGPTEmail
Indonesia

Orangutan Trekking and Bukit Lawang Travel Guide

by Livia August 22, 2026
written by Livia

Most people come to Bukit Lawang for one reason: to trek into the Sumatran rainforest in search of orangutans.

That was the main reason we came too, but after spending a week here we discovered that Bukit Lawang is also a lovely place to simply stay for a while and relax in nature.

Set alongside the Bohorok River on the edge of Gunung Leuser National Park, the village is surrounded by dense green rainforest. Away from the orangutan trekking, there isn’t a huge list of things you need to see or do, and that’s part of the appeal. We spent our days walking along the river, exploring the village, eating at small restaurants and enjoying being surrounded by nature.

If your North Sumatra itinerary allows it, we’d recommend staying a little longer rather than arriving, doing the trek and immediately leaving again.

How to Get to Bukit Lawang from Medan airport

We flew into Medan, the main gateway to Bukit Lawang and northern Sumatra, and arranged a private pick-up from the airport with our hotel.

The drive from Kualanamu International Airport (Medan) to Bukit Lawang usually takes around 3.5–4.5 hours, depending on traffic.

As you get closer to Bukit Lawang, the busy city streets gradually give way to smaller towns, plantations and increasingly green countryside.

Once you arrive, it’s worth knowing that parts of Bukit Lawang are pedestrian-only. Depending on where you’re staying, you may need to walk the final section to your accommodation with your luggage. As we booked our pick up with the hotel, the hotel staff were there meeting us and helping us with our luggage to the hotel.

Where to Stay in Bukit Lawang

We stayed in three different places during our eight nights in Bukit Lawang, which gave us a good feel for the different accommodation available around the village.

Sam’s Bungalows

Our first stay was at Sam’s Bungalows, towards the end of the village beside the river.

The location is lovely, with the river and rainforest right outside, and we found the staff very friendly. There’s also a restaurant serving good food, so you don’t necessarily need to walk back into the main part of the village whenever you want to eat.

Being towards the end of the village also means you’re away from some of the busier areas.

Rainforest view from Sam's Bungalow in Bukit Lawang
Restaurant view from Sam's Bungalow in Bukit Lawang

Garden Inn

We also stayed at Garden Inn, which has beautiful views across the surrounding greenery.

The rooms were quite simple and we found it a little hot and noisy at times as you are more in the middle of the village, but the setting is lovely. If you’re mainly looking for somewhere inexpensive with great views and don’t mind fairly basic accommodation, it can be a good option.

Rainforest view from Garden Inn in Bukit Lawang

On The Rocks

Our favourite place we stayed in Bukit Lawang was On The Rocks.

It’s set higher up amongst the trees, right on the edge of the rainforest, so reaching it involves a bit of a walk uphill, but the location is worth the effort.

There are several different types of accommodation at different price points. We stayed in one of the cheapest options, a simple little thatched cottage, and absolutely loved it. The more expensive rooms are beautiful, but you don’t need to spend a lot to enjoy the setting, so there are options for different budgets.

You’re surrounded by rainforest here, and it feels much more secluded than staying down beside the main path through the village. We even had a female orangutan with her baby nesting in the trees outside our room. The food is also good here.

If we returned to Bukit Lawang, this is where we’d stay again.

Thatched cottage at On The Rocks in Bukit Lawang
Mother and baby orangutan in the trees at Bukit Lawang
Thatched cottage at On The Rocks in Bukit Lawang

Orangutan Trekking in Bukit Lawang

Seeing Sumatran orangutans in the wild is the main reason most travellers visit Bukit Lawang.

The village sits beside Gunung Leuser National Park, part of the wider Leuser Ecosystem and one of the remaining places where Sumatran orangutans live in the wild.

You can choose anything from a one-day trek to multi-day jungle expeditions, with longer treks taking you deeper into the rainforest and usually involving camping overnight.

We chose a one-day trek, which was plenty challenging enough for us.

Thomas monkey in the rainforest near Bukit Lawang
Sumatran orangutan in the rainforest near Bukit Lawang
Orangutan trekking in Gunung Leuser National Park near Bukit Lawang

How Difficult Is the Orangutan Trek?

Don’t underestimate the terrain.

The trekking involves a lot of steep ups and downs through humid rainforest. There were sections where we were pulling ourselves uphill using vines and tree roots, followed by steep descents where you really need to watch where you’re putting your feet.

It was tough at times, but also incredibly rewarding. The rainforest itself is beautiful, quite apart from the wildlife you’re there to see.

You don’t need to race through it either. A good guide will adapt the trek to your ability and let you take breaks when needed.

Hiking through the rainforest on a Bukit Lawang orangutan trek

Choosing an Ethical Orangutan Trekking Guide

Choosing the right guide was particularly important to us.

There are rules around encounters with orangutans, including maintaining an appropriate distance and never feeding or touching them. Before booking, we wanted to make sure we went with guides who respected those rules rather than prioritising close-up photographs for tourists.

Most accommodation in Bukit Lawang can arrange orangutan trekking, but you don’t have to book through the place you’re staying. Green Hill is another guesthouse in the village, and although we weren’t staying there, we simply walked over after we arrived in Bukit Lawang and asked about arranging a trek.

We ended up trekking with Randa Armando from Green Hill, who was excellent. He took the trek at our pace, helped us through the more difficult sections and was respectful of the wildlife we encountered.

After later staying at On The Rocks and getting to know the place a little, we would also have been very happy trekking with their guides. If we returned, we’d probably arrange our trek directly through them.

Whichever company or guesthouse you choose, we’d recommend asking about their approach to wildlife before booking. Guides should maintain the required distance from orangutans and shouldn’t feed them, touch them or encourage tourists to get closer for photographs.

Rafting Back to Bukit Lawang

At the end of many jungle treks, you’ll have the option of returning to Bukit Lawang by river rather than walking all the way back.

The “rafting” is done using large inner tubes tied together to create a simple raft.

I was a little hesitant about this part before we did it, but it turned out to be really enjoyable. After hours of climbing up and down through the hot rainforest, getting onto the river was a pretty good way to finish the trek.

You float downstream through the jungle before eventually arriving back in Bukit Lawang.

If you’re unsure about adding the rafting to your trek, we’d do it again.

What Else Is There to Do in Bukit Lawang?

Not much. And we mean that in a good way.

Bukit Lawang isn’t somewhere you need an itinerary packed with attractions. We spent plenty of time simply walking along the river and through the village. You can follow the riverside paths, cross the suspension bridges and walk into the main town away from the more tourist-oriented accommodation beside the national park.

There’s also a small market area by the river, which is worth wandering through while you’re exploring. You can also walk further into the main town, away from the guesthouses and restaurants clustered closer to the national park.

For us, the appeal of staying longer was having nowhere in particular we needed to be. It’s a good place to slow down, read, sit beside the river and enjoy being surrounded by nature.

Bohorok River running through Bukit Lawang
Bukit Lawang village
Bohorok River running through Bukit Lawang

Where to Eat in Bukit Lawang

There are plenty of small restaurants and guesthouse restaurants along the river in Bukit Lawang, so finding somewhere to eat is easy.

We found that many of the menus were quite similar, usually with a mixture of Indonesian dishes and familiar Western options aimed at travellers.

We mostly ate at our accommodation, particularly Sam’s Bungalows and On The Rocks, simply because it was convenient and the food was good. With many of the guesthouses and restaurants spread along the river, there wasn’t much reason to go searching for a particular restaurant every evening.

We wouldn’t come to Bukit Lawang specifically for the food, but there are more than enough options for a stay of several days.

How Long Should You Stay in Bukit Lawang?

Many travellers spend just two or three nights in Bukit Lawang, giving them enough time to arrive, complete an orangutan trek and continue their journey through Sumatra.

We stayed for eight nights and were very happy that we did.

You certainly don’t need that long to see the main attraction, but Bukit Lawang is worth considering as somewhere to slow down for a few days, particularly if you’re travelling for a longer period.

After the trek, having a few days to relax beside the river and enjoy the rainforest without another activity planned was exactly what we wanted.

If you’re on a shorter Indonesia trip, we’d suggest 2-3 nights. If you have more time and enjoy nature, adding a few extra nights gives you the chance to experience Bukit Lawang beyond the orangutan trek.

Staying Near Medan Airport

If your flight times mean you need a night in Medan before or after visiting Bukit Lawang, we stayed at Hotel Deli River and Restaurant Omlandia for a couple of nights.

It was a really relaxing place to stay, particularly after travelling. There’s a pool, plenty of space to unwind and we even had a floating breakfast served in the pool.

Rather than trying to squeeze the journey between Bukit Lawang and the airport around a flight, spending a night or two here made the journey much more relaxed.

Hotel Deli River and Restaurant Omlandia in Medan
Hotel Deli River and Restaurant Omlandia in Medan, near airport
Floating breakfast in pool at Hotel Deli River and Restaurant Omlandia

Is Bukit Lawang Worth Visiting?

If seeing Sumatran orangutans in the wild is something you want to experience, Bukit Lawang is an obvious addition to a Indonesia itinerary.

The orangutan trek was challenging, beautiful and incredibly rewarding, but we also really enjoyed our longer stay in Bukit Lawang, having time to simply walk beside the river, waking up surrounded by rainforest and watching an orangutan and her baby in the trees outside our room.

You can come for the orangutans.

But you might want to stay a little longer for Bukit Lawang itself.

August 22, 2026 0 comments
FacebookTwitterPinterestLinkedinRedditStumbleuponWhatsappTelegramThreadsOpenAIChatGPTEmail
Newer Posts
Older Posts

Recent Posts

  • The Sendai Travel Guide: Real Japan

  • A Self-Guided Art Walk in Kigali: Exploring Kacyiru’s Art Centres

  • Windhoek Travel Guide: Is Namibia’s Capital Worth Visiting?

We use Safetywing

We use THS

Trusted House Sitters

Here’s 25% off your annual membership to TrustedHousesitters - thanks to your pet loving pals at LBSBWorld.

Join now with 25% Off!

We use NordVPN

NordVPN

Get 3 months of NordVPN right now!


The best VPN service for a free, open internet

Get NordVPN!

We use Wise

Wise

Get Zero Fees on a transfer up to €500


Spend in 150+ countries like a local with Wise card

Get Wise!

Follow us on Instagram

A Bear Called Paddington abearcalledpaddington 🌍 7 years full-time travel
Follow on Instagram
©2026 LBSBWorld - All Right Reserved - Designed and Developed by Livia & Sam
LBSB World
  • Home
  • Destinations
    • Africa
      • Namibia
      • Rwanda
    • Asia
      • China
      • Indonesia
      • Japan
    • Europe
      • Albania
      • Bosnia-Herzegovina
      • Croatia
      • Montenegro
      • Netherlands
      • North Macedonia
      • Serbia
    • North America
      • Dominican Republic
  • Travel itineraries
  • Plan your trip
  • About Us
    • About Sam & Livia
    • The Story Behind Our Full-Time Travel Life
    • abearcalledpaddington